As for the T3 Syncro, we have also created illustrated instructions for changing the VC of the T4 Syncro. The procedure and tightening torques are based on the VW repair guide “02G all-wheel drive” from 2004.
Note: This guidance is not an official repair manual – it is just our recommended way how to do it. And we assume that every bolt can get opened easily – just one rusted screw can change the situation drastically.
Procedure: First the rear segment of the propshaft is removed. Then you can remove the viscous coupling from the input shaft of the differential. The old gear oil should be drained beforehand. A lifting platform makes work considerably easier, but the change is also possible with simple ramps.

Tools:
- 17mm Allen-head spanner or socket (male-type)
- 27mm deep socket (injection nozzle socket)
- Torque wrench (160 Nm)
- 10 XZN Socket (female-type)
- DN40 & DN50 HT waste pipe (for driving in the shaft seals)
Spare parts / consumables:
| Spare part nr. | Description | Option |
| 02D 525 597 | Shaft seal (bevel gear) 71×7 [included] | Corteco – 12015557B |
| 02D 525 583 | Shaft seal for viscous coupling [included] | – |
| D 000 600 A2 | VW Threadlocker (green) | Loctite 270 |
| G 052 128 A1 | VW Radial Shaft Sealing grease (blue) [included in a 2ml syringe, supplied by us] | – |
| G 060 726 A2 | VW Gear oil G50 – 1 liter | Gear oil 75W90 – GL5 |
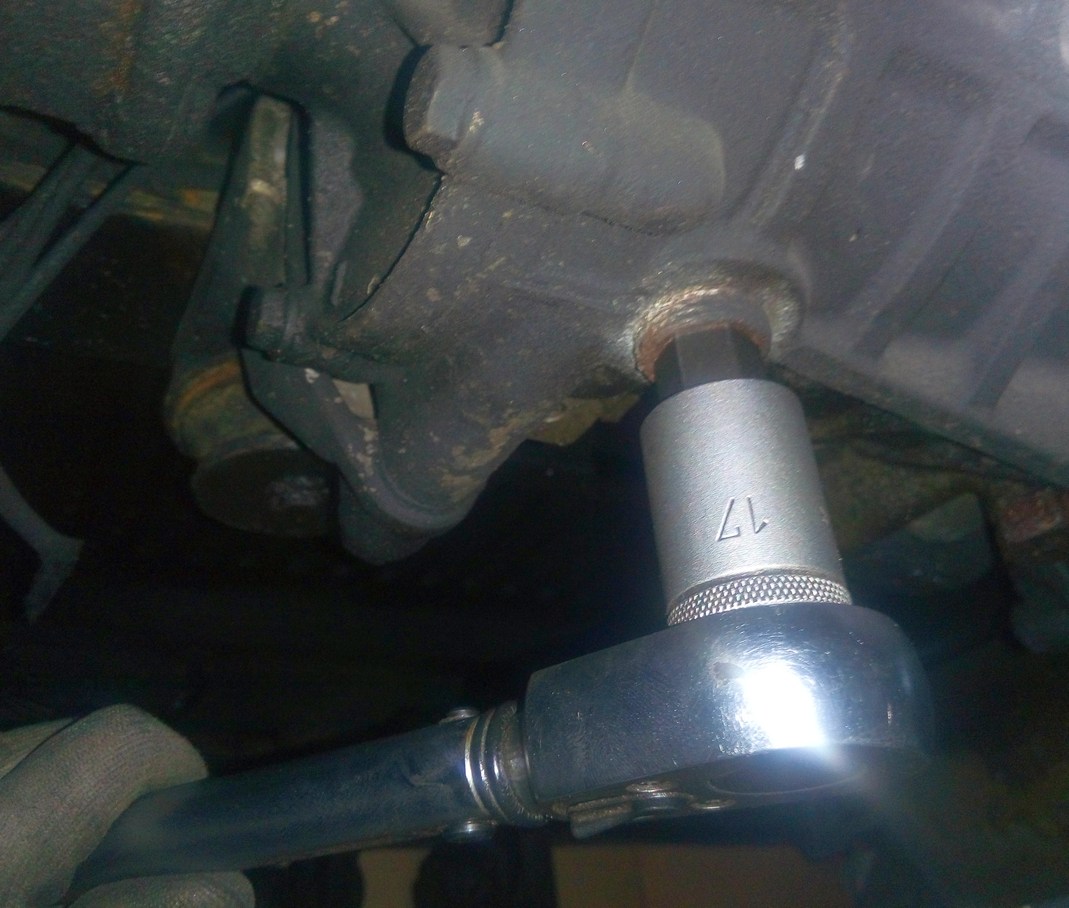
1) Drain the gear oil (differential)
First you should check whether the two screw plugs can be opened with the 17 mm Allen key. You start with the filler plug. The screws do not have a sealing ring, but seal via a conical pipe thread (taper thread) directly in the aluminum thread.
 |
 |
The screws are often rusted or tightened too much due to ignorance of the sealing function (25 Nm tightening torque). In any case, you should first pretreat the screws with some rust remover.
After the drain plug has also been unscrewed, check the abrasion on the magnet. Fine metal powder is ok, but coarser metal fragments do not bode well. At best, the drained gear oil should make up a full liter. If there is a large shortage (> 0.4 l), one must assume that the pinion bearing has not been properly lubricated.
2) Demount rear prop-shaft segment
First, the position of all parts of the rear propshaft to each other is marked with a touch-up pen. The reassembly takes place in the same position, otherwise hum and unbalance may occur.
 |
 |
- Unscrew the 6 connecting screws (Allen M8) on the constant velocity joint of the prop-shaft (scrape free beforehand)
- Tie up the prop-shaft tube at the front or catch it from below
 |
 |
- Remove the rubber protective ring from the vibration damper (rag joint)
- Unscrew 3 multi-tooth screws on the vibration damper
 |
 |
 |
 |
- Unscrew the 2 fastening screws on the intermediate bearing, supporting / supporting the rear prop-shaft tube
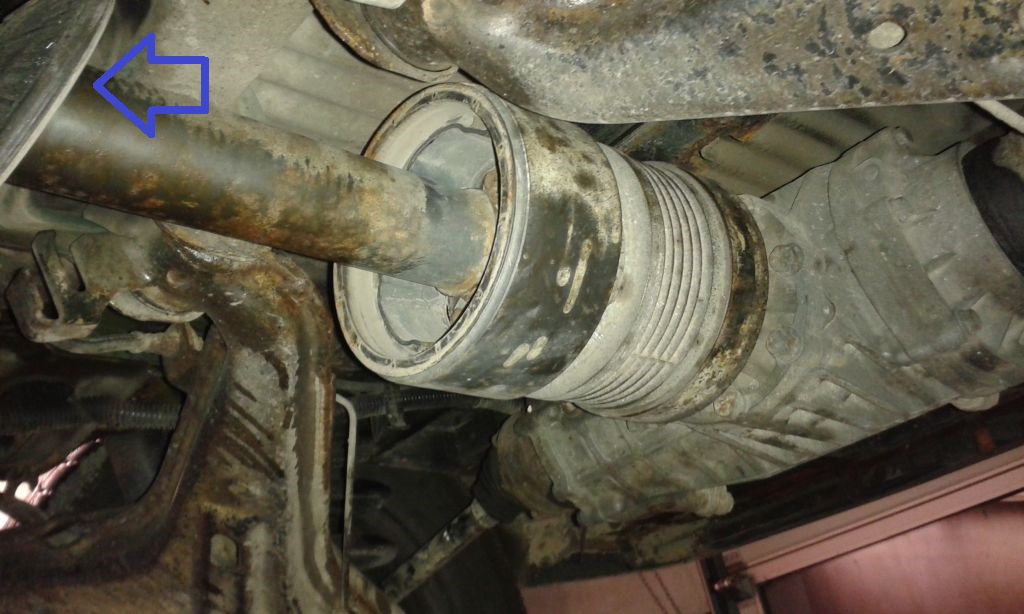
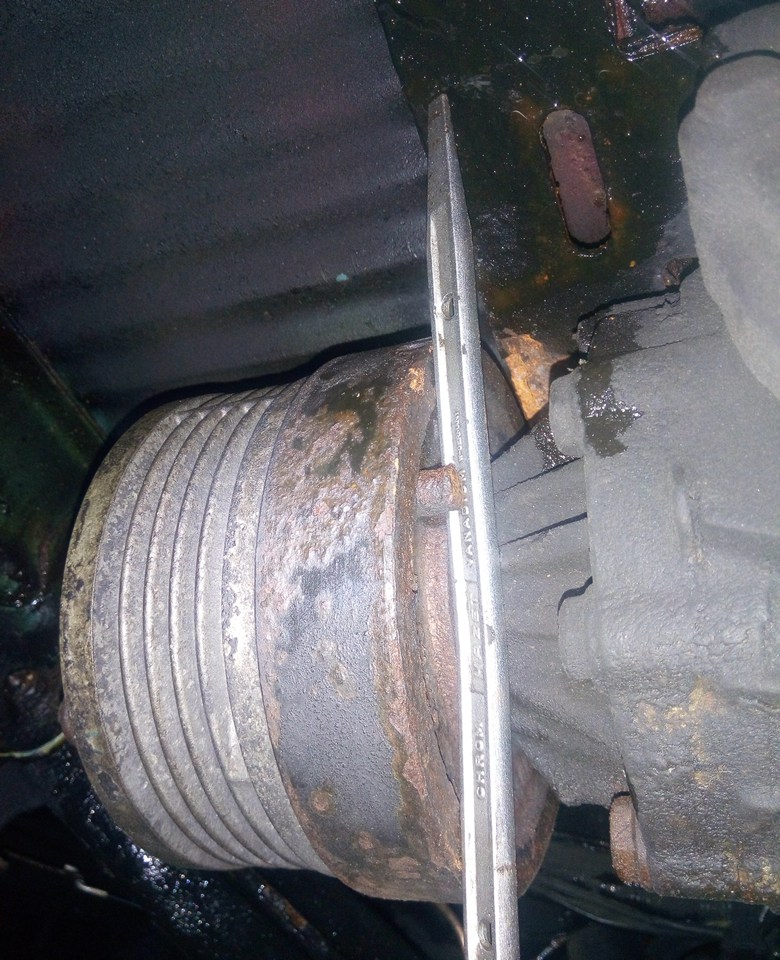
- Pull the rear prop-shaft tube as horizontally as possible from the centering pin of the viscous coupling. Proceed with care, otherwise the sensitive plastic centering sleeve in the vibration damper can be damaged!
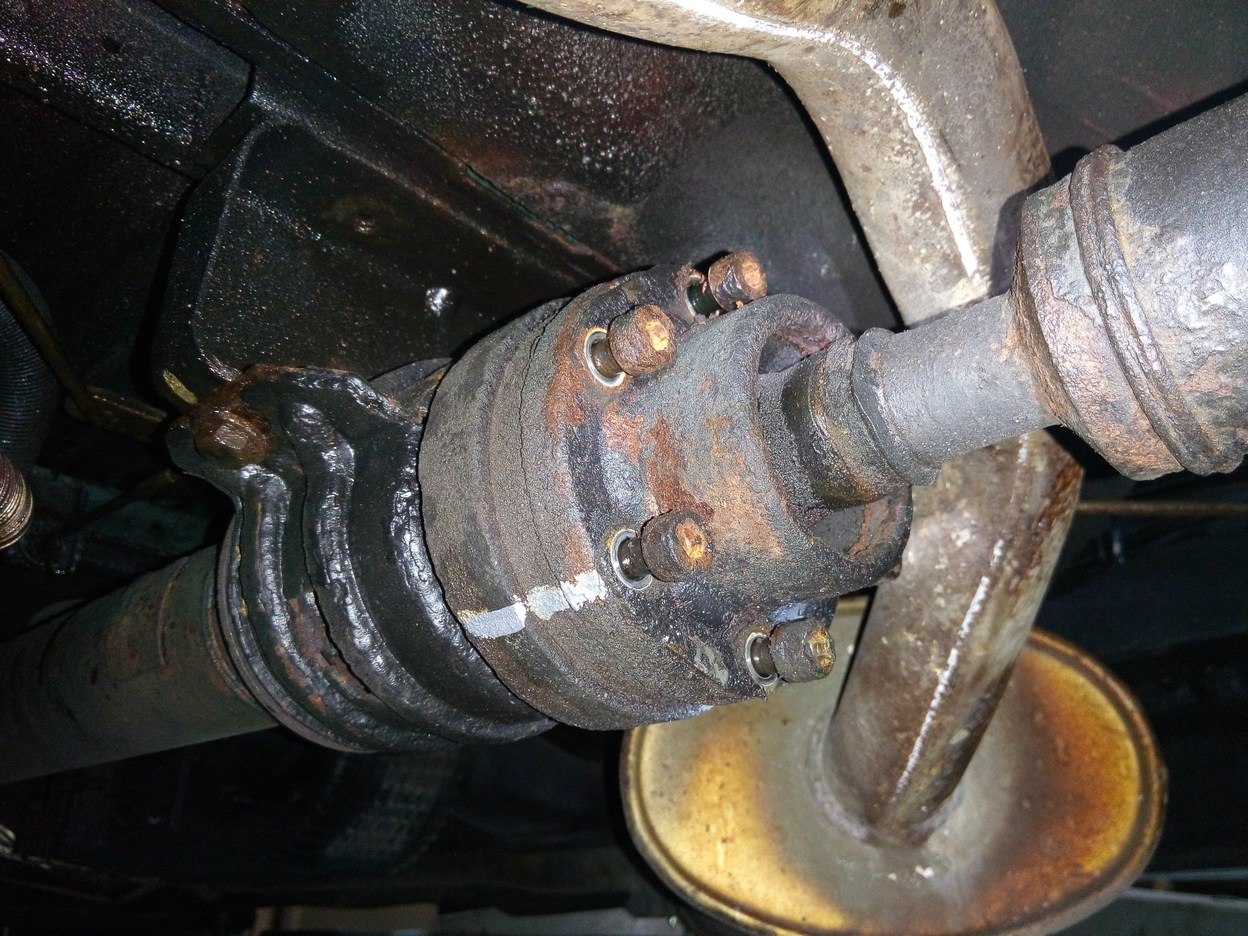
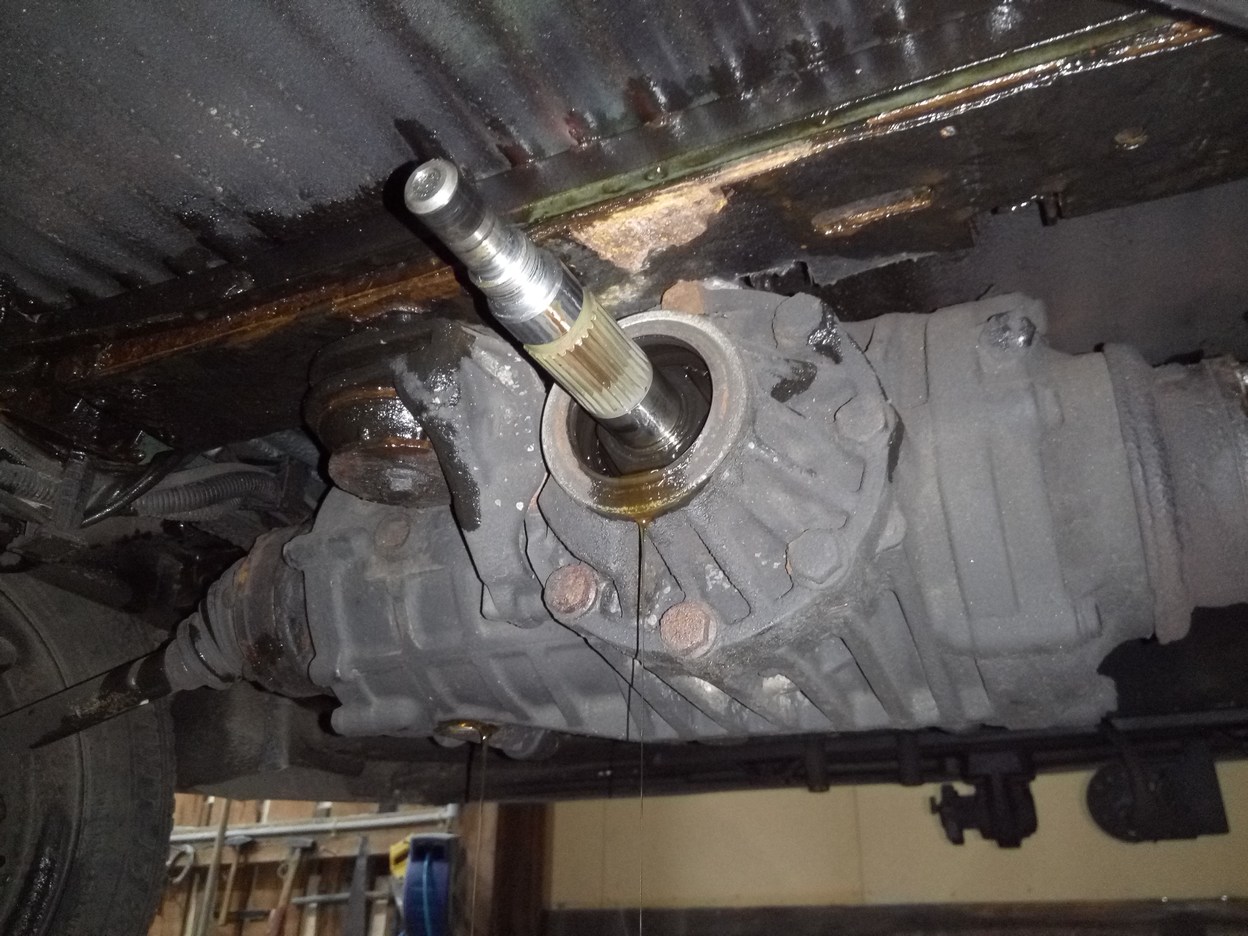
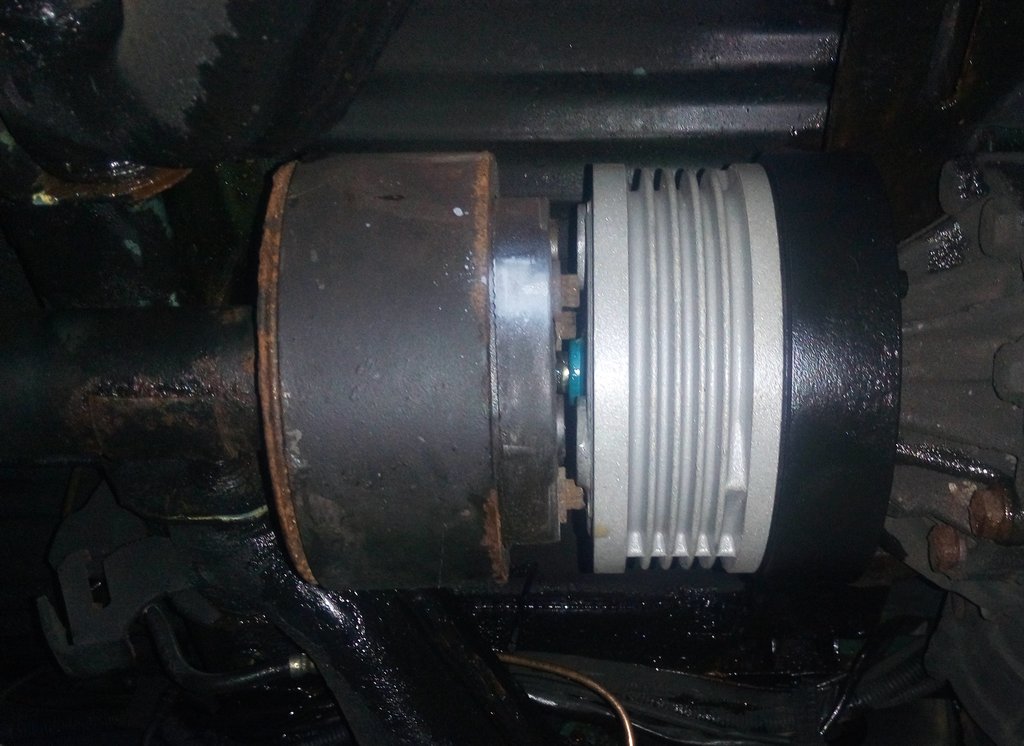
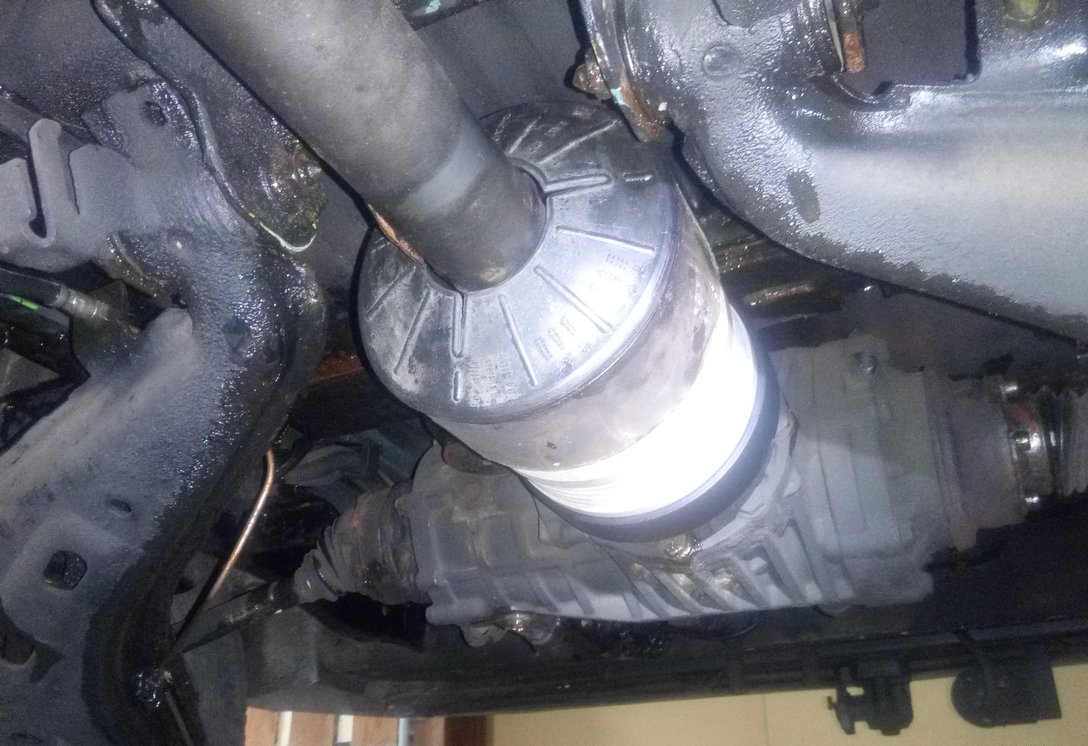
3) Remove the Viscous Coupling
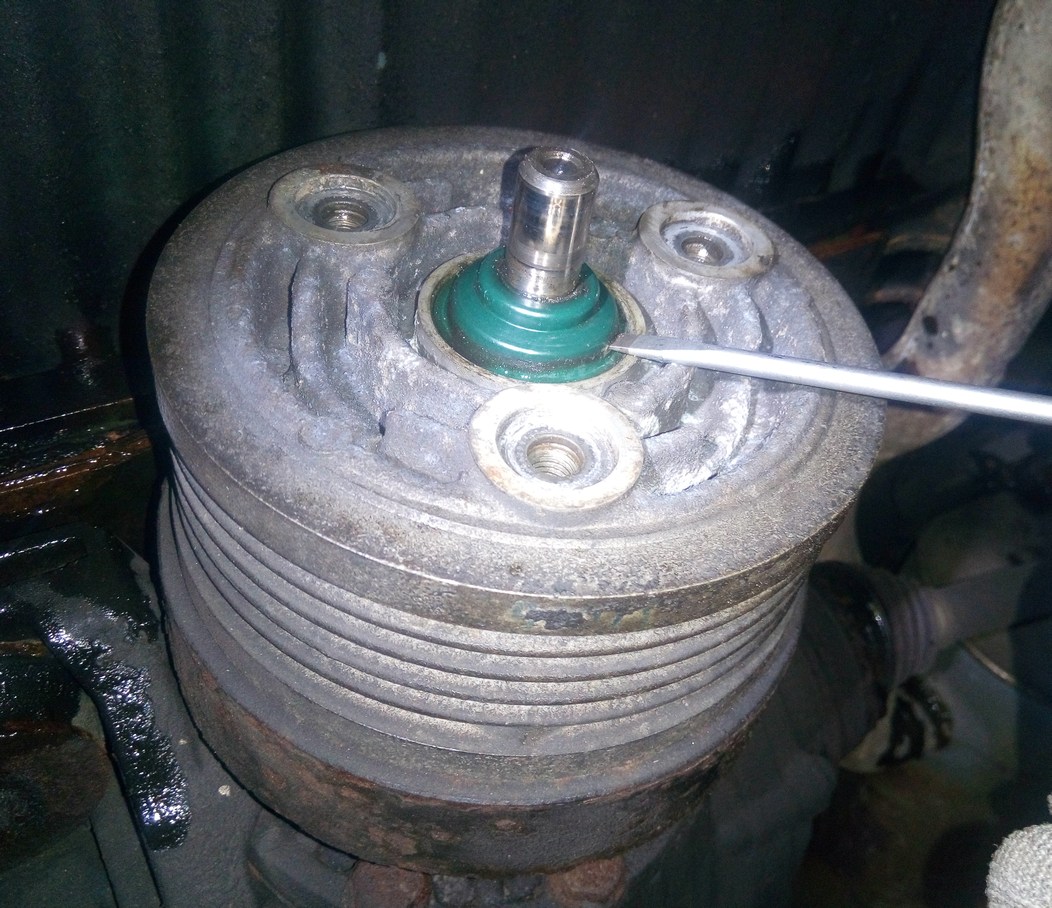
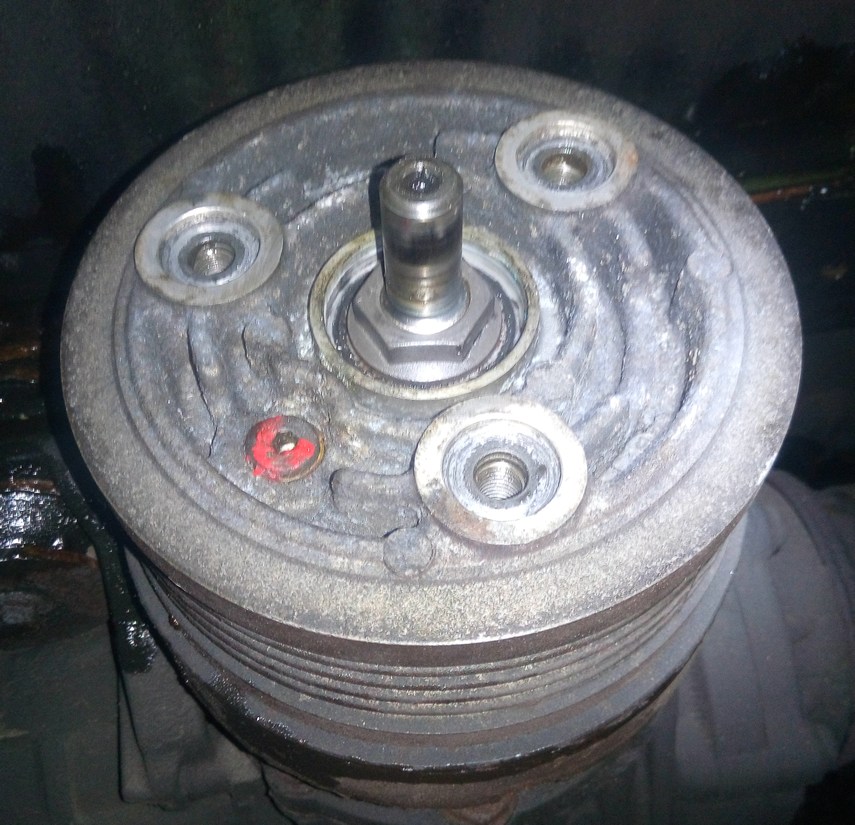
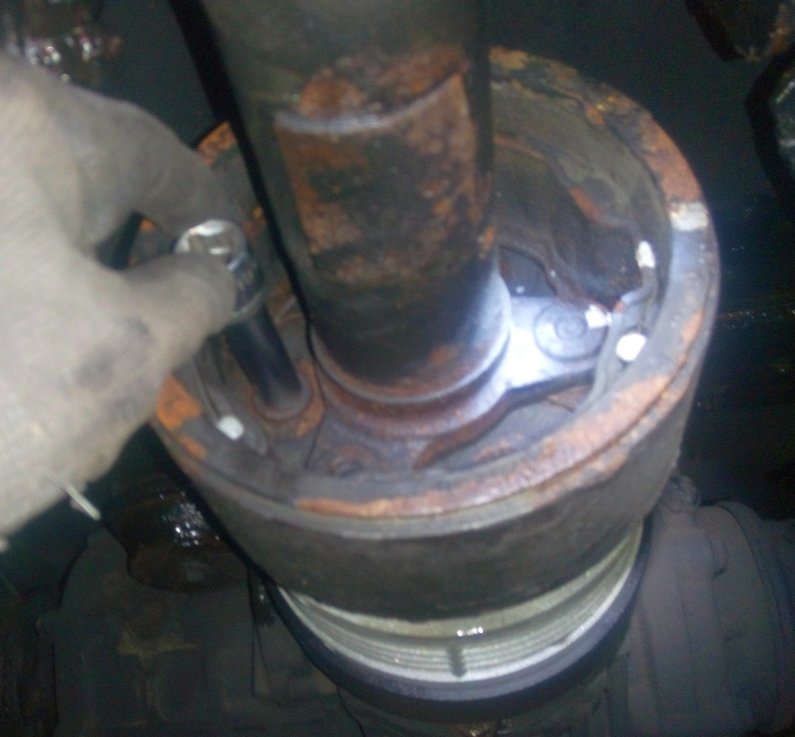
The green shaft seal on the centering pin can unfortunately only be removed in a destructive manner. To do this, drive a flat, pointed screwdriver into the shaft seal with moderate hammer blows, and then pry it out. Make sure that the seat of the shaft seal in the aluminum housing does not get damaged. The centering nut (27 mm) is now visible after removing the shaft seal.
 |
 |
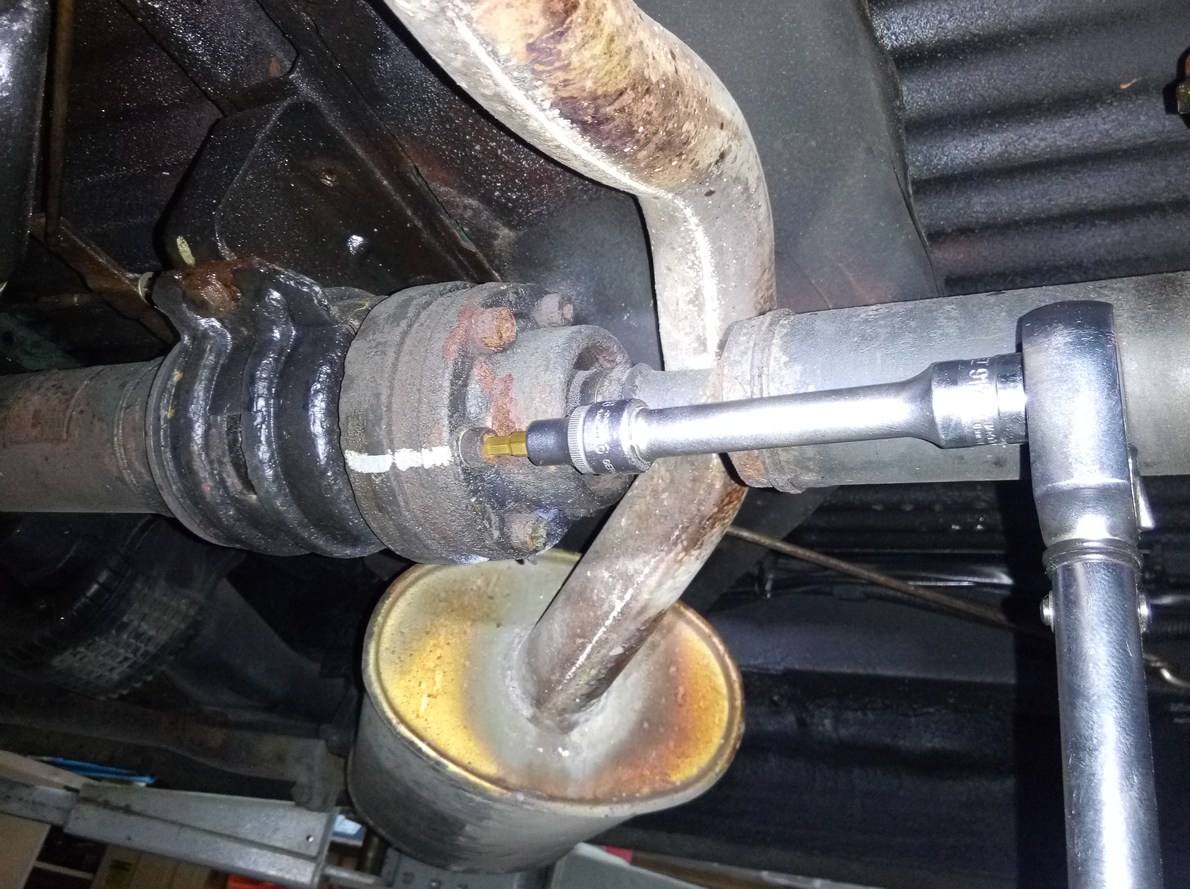
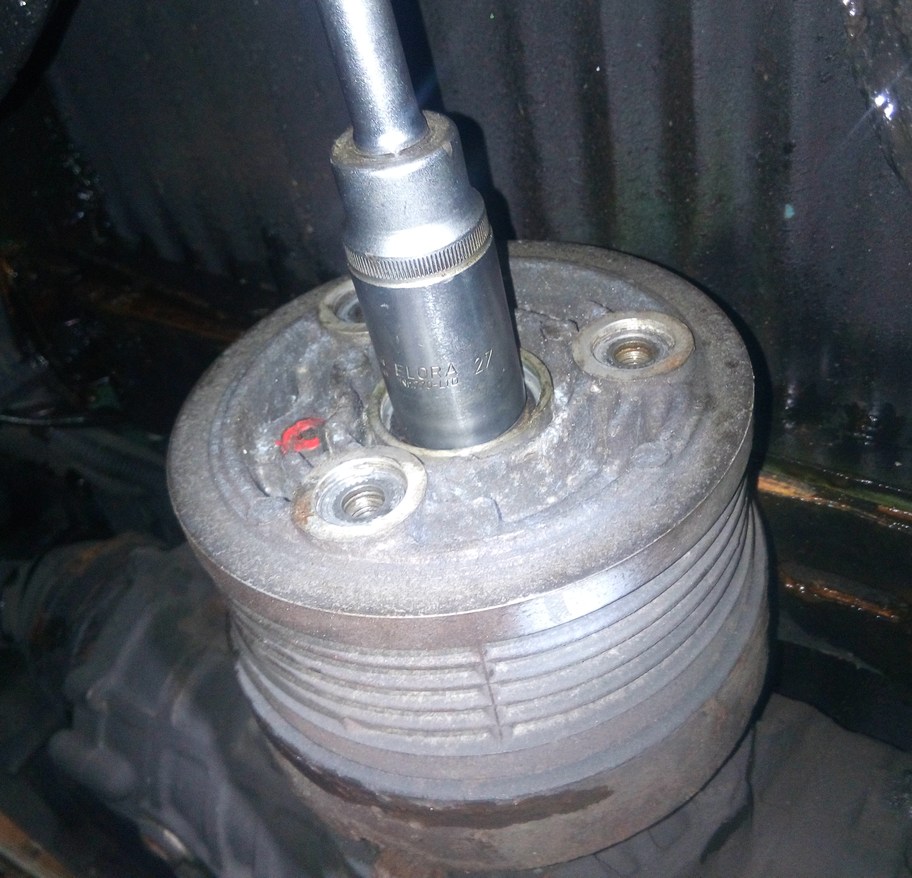
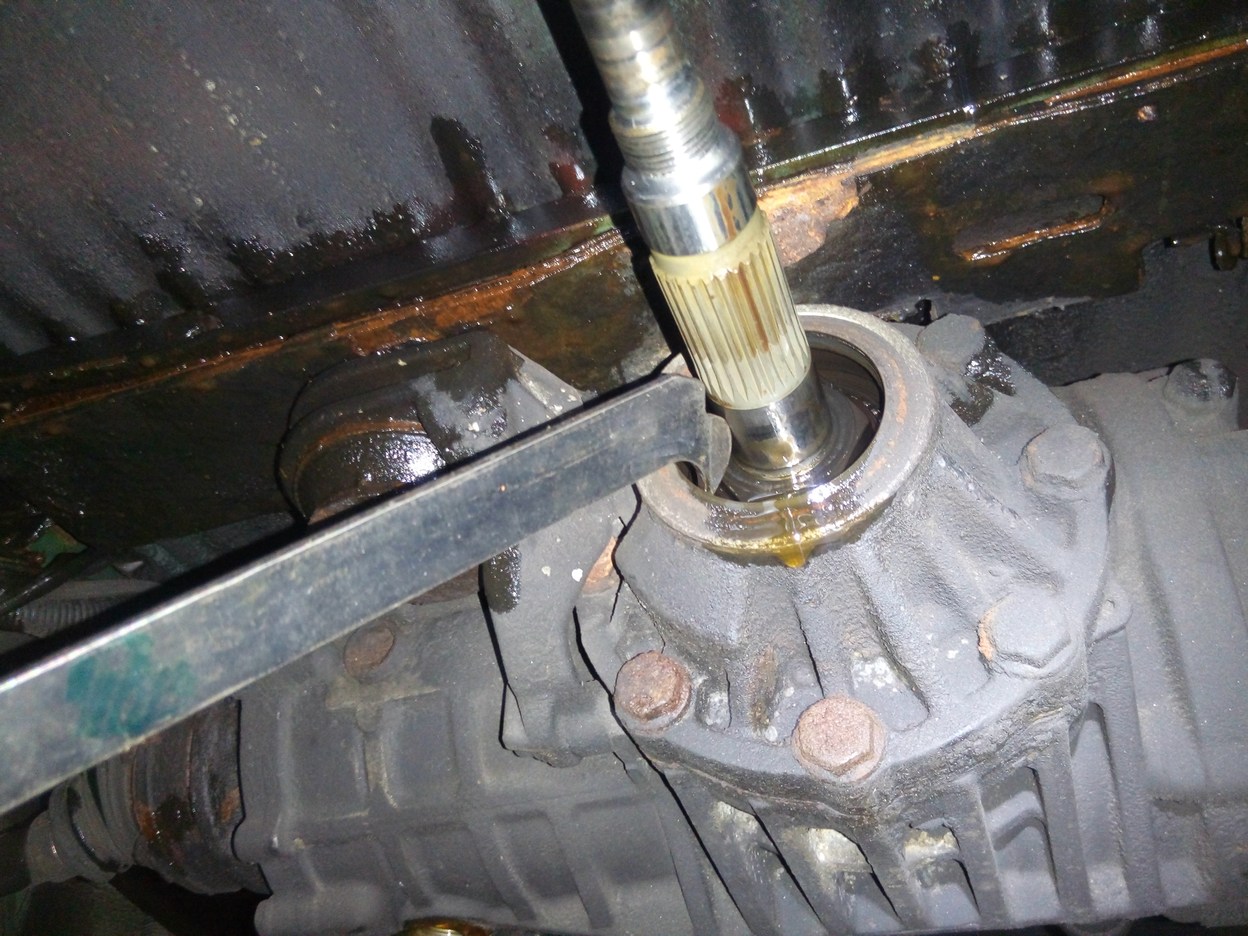
On vehicles WITHOUT ABS (freewheel), it is sufficient to apply the handbrake to unscrew the centering nut. The centering nut was once screwed with 160 Nm and a thread locker. Accordingly, you should use the longest possible (torque) wrench to minimize the effort. Then you can simply pull off the viscous coupling to the front.
 |
 |
The following passage in blue only affects T4 buses WITH ABS:
On the T4 Syncro with ABS, there is a pinch roller freewheel in the differential (like on a bicycle), which ensures that the viscous coupling spins when you want to unscrew the centering nut.
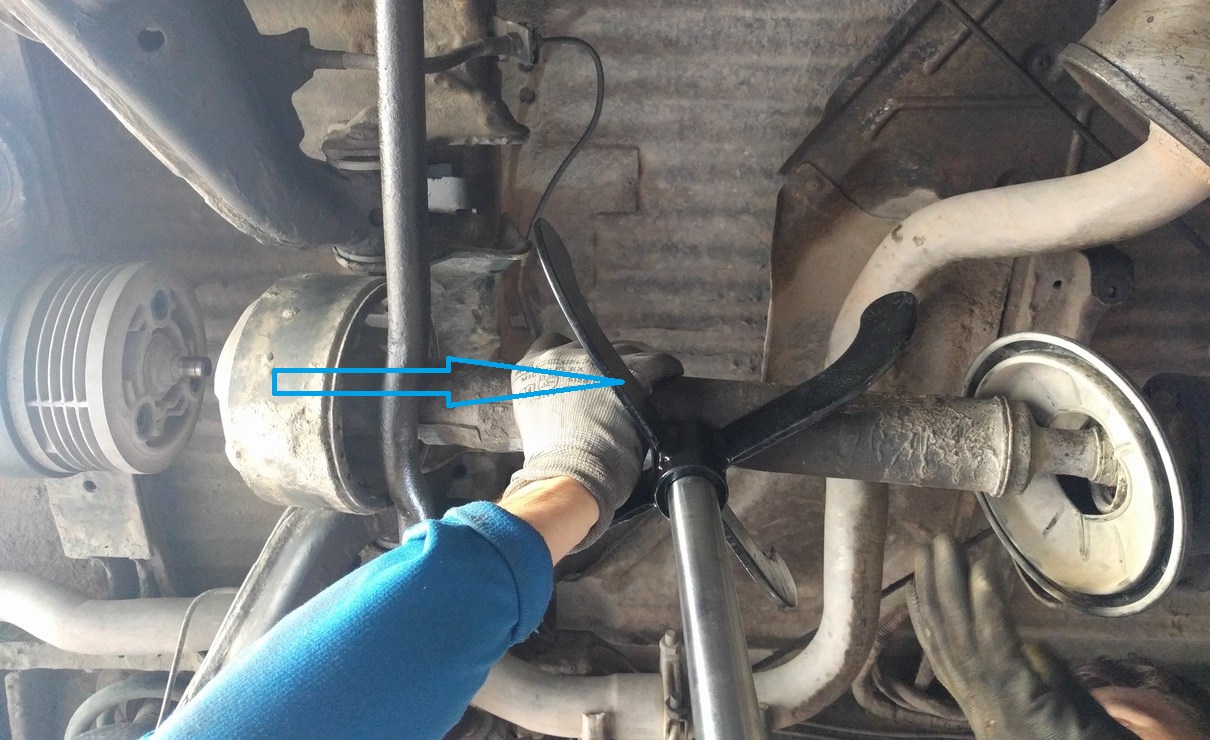
The centering nut can usually be opened quickly and easily with a pneumatic impact wrench. If there is no impact wrench at hand, you have to mechanically block the viscous coupling. We recommend using the cast pin on the steel cover of the viscous coupling, which is designed for a significantly higher load. However, please do not mix it up with the sensitive, screwed-in brass valve (with aluminum cap on top)!
 |
 |
In other instructions it is advised to screw the 3x M10 multi-tooth screws back into the viscous coupling and to use them as counterholders. We strongly advise against this procedure, as this can deform the relatively soft aluminum housing of the VC.
VW describes a different procedure in the repair guide to mechanically lock the freewheel. In our experience, this procedure is relatively unreliable because the electro-pneumatic freewheel lock is often (unnoticed) defective. Nevertheless, the procedure is briefly mentioned for the sake of completeness:
1) Raise the vehicle (wheels must turn freely)
2) Start the engine
3) Engage reverse gear, leave clutch depressed
4) Freewheel-lock (should) click audibly; if necessary, turn the rear wheel a little
5) Also clamp the hose of the vacuum line (brown) to the freewheel lock
6) Turn off the engine, switch on the ignition again, reverse gear remains engaged
7) Unscrew the centering nut (27mm)
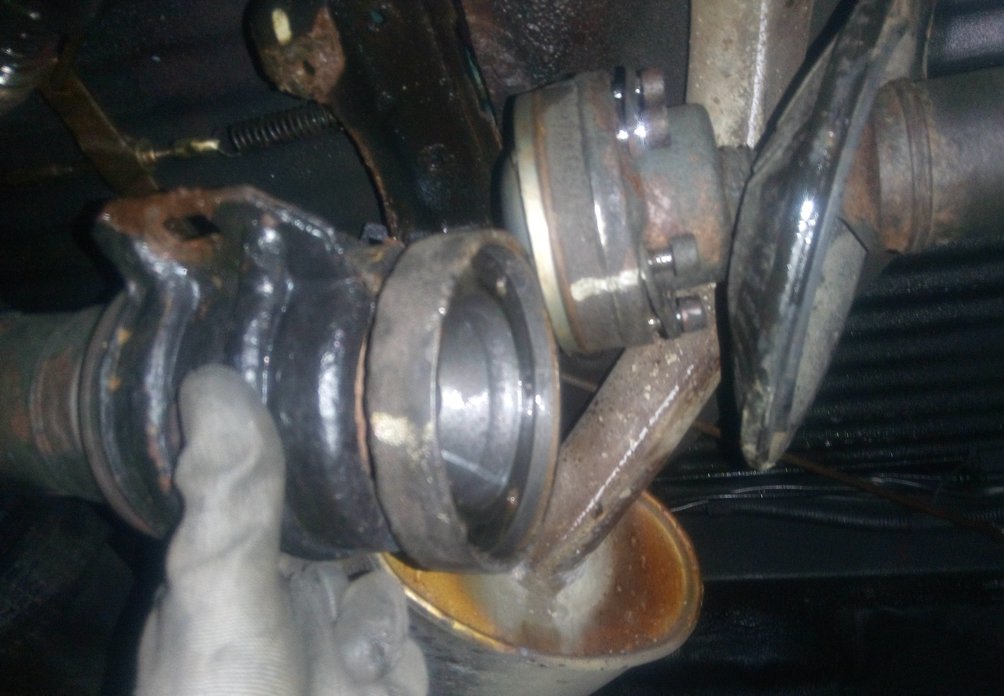
4) Replace the shaft seal in the differential
If the shaft seal (02D 525 597 / 57x71x7) has not yet been replaced in the differential, then you should take the opportunity straight away. In the VW repair guide, the VW 681 special tool is used to pull out the shaft seal. But it also works with a stable screwdriver. Make sure not to damage the aluminum seat in the edge area. Therefore, you should place a small piece of wood in the edge area.
 |
 |
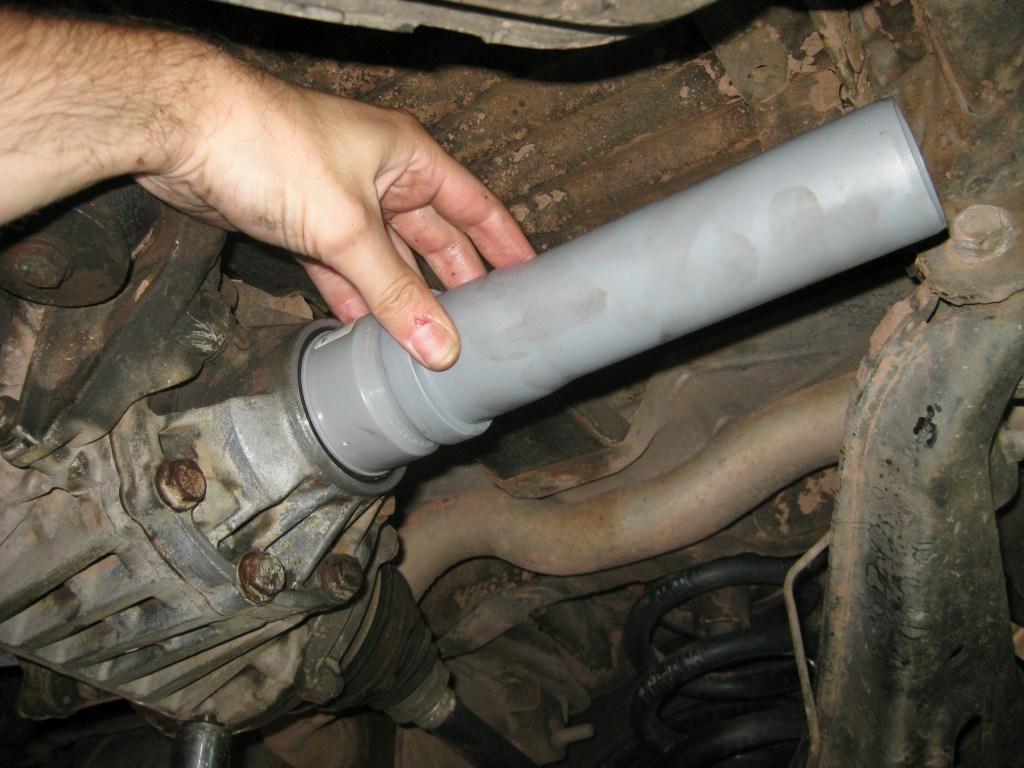
Lightly oil the new shaft seal on the outside diameter with some gear oil. Drive it in with the sewage pipe DN50 up to the stop. Then fill the space between sealing- and dust-lip with the blue VW sealing grease G052 128 A1 [supplied in a 2ml syringe].
.
 |
 |
5) Install the new VC
After the shaft seal in the differential has been successfully replaced, the new VC is installed in reverse order.
 |
 |
 |
 |
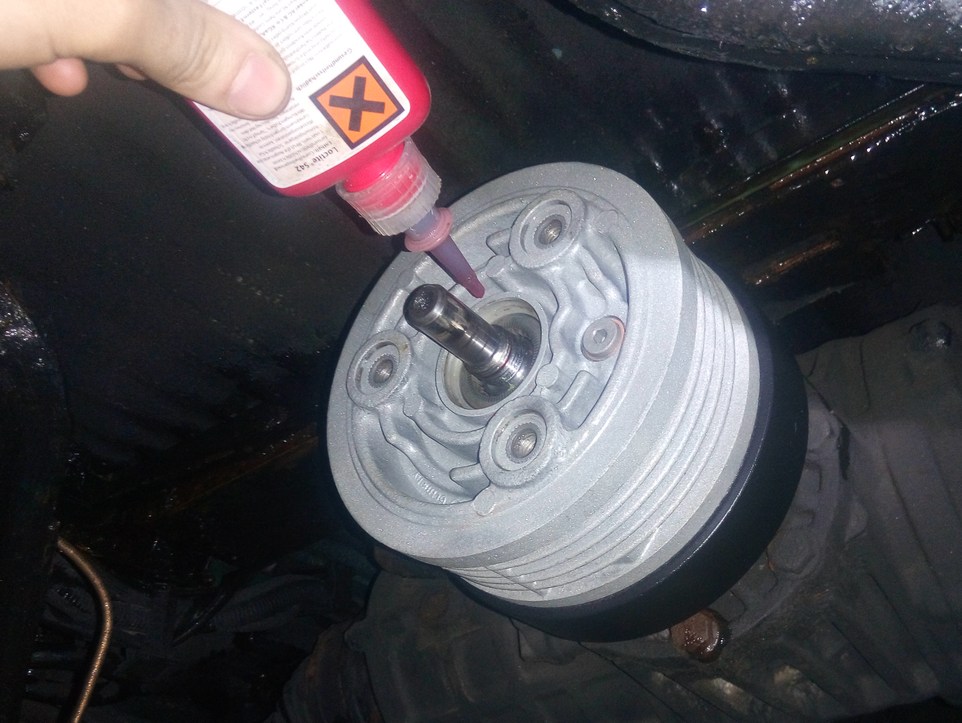
- Slide on the VC by turning it slightly
- Screw on the centering nut (27mm) with 160 Nm (apply handbrake) and use thread locker
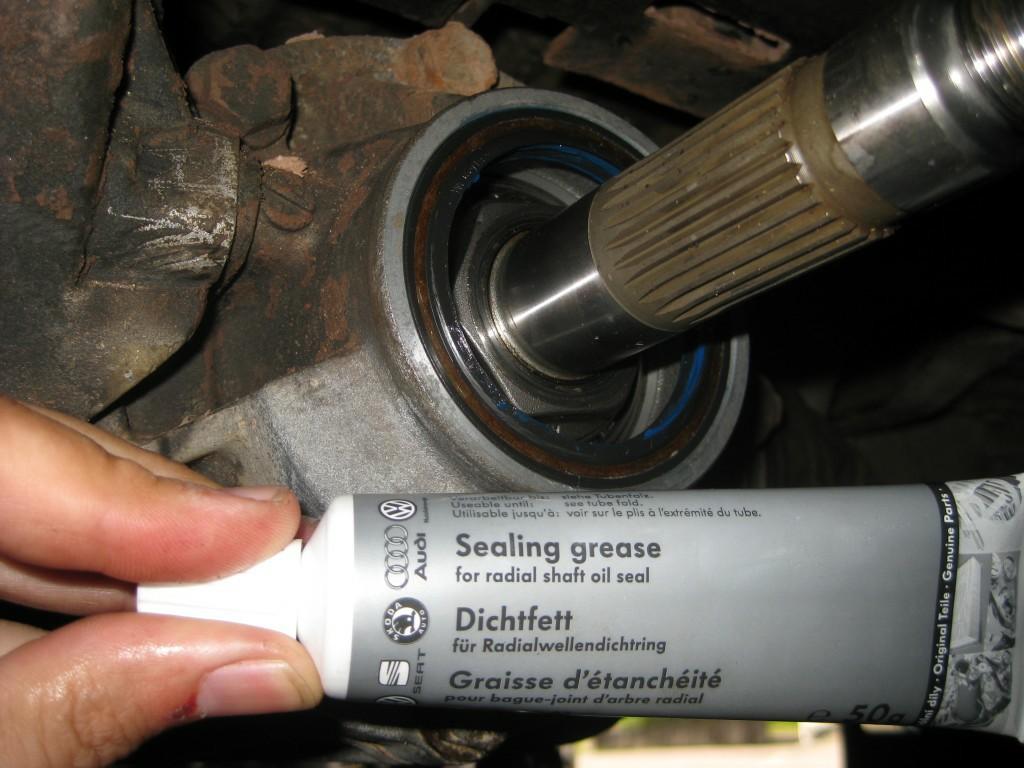
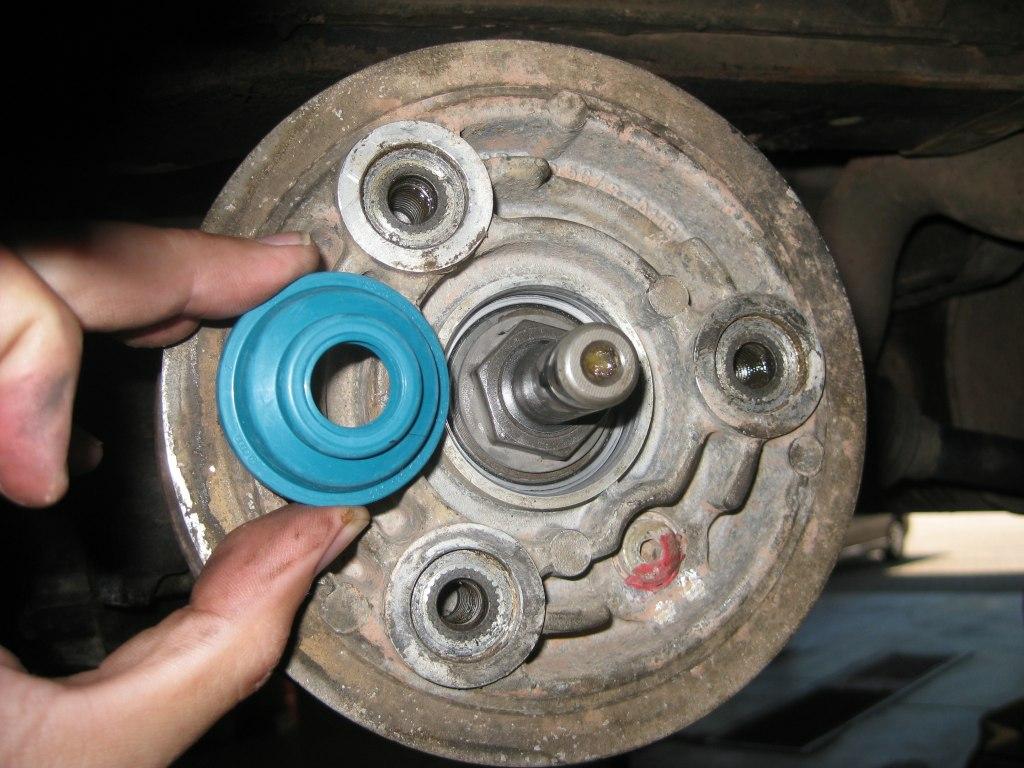
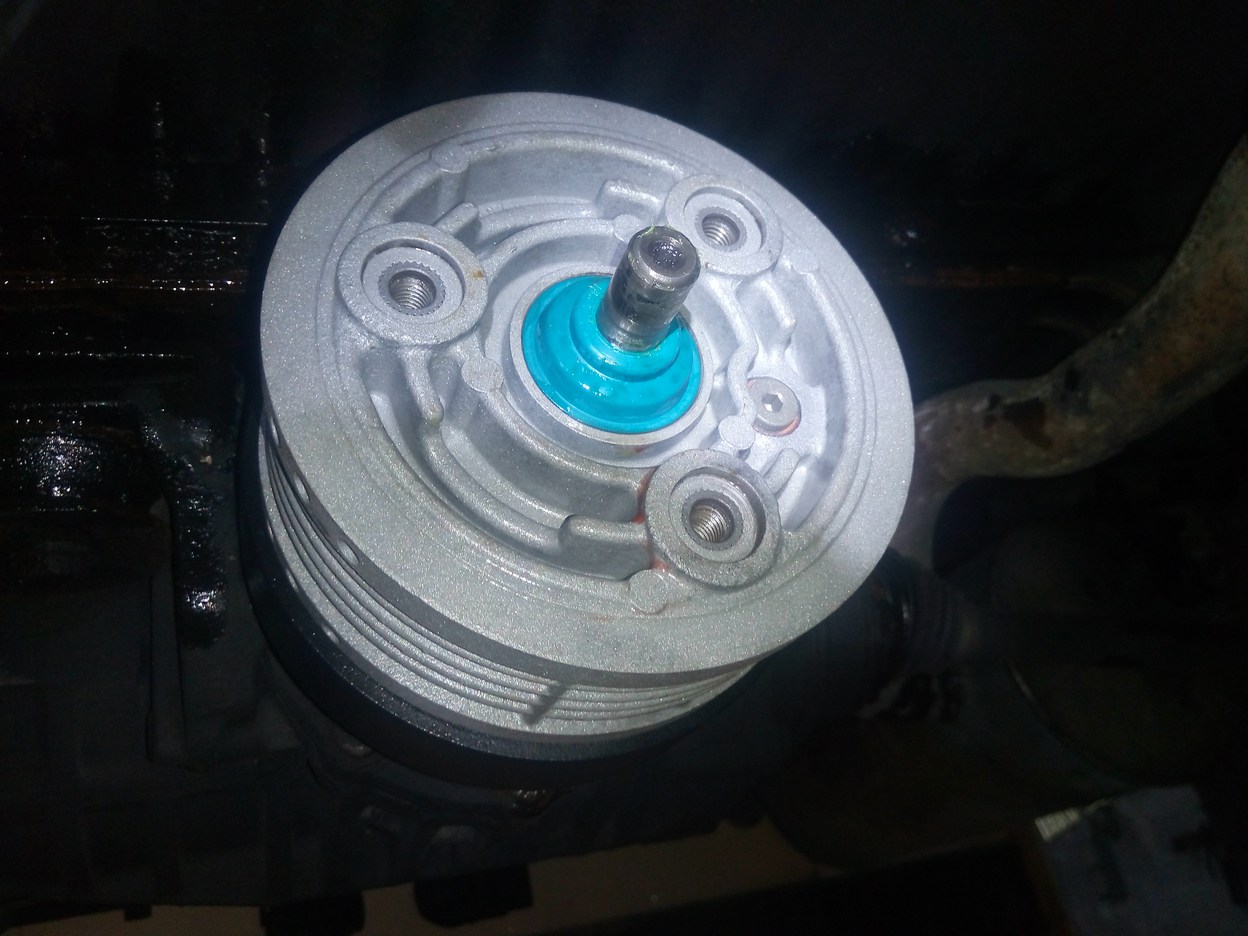
- Lightly oil the new shaft seal (02D 525 583) for the VC on the outside diameter with gear oil
- This time, fill the space between sealing- and dust-lip beforehand with the blue VW sealing grease (G 052 128 A1)
- Drive in the shaft seal with a sewage pipe DN40
6) Reassembly
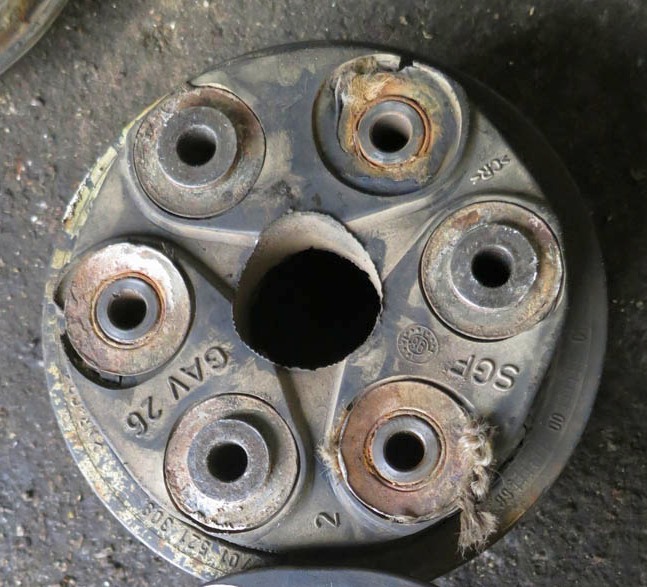
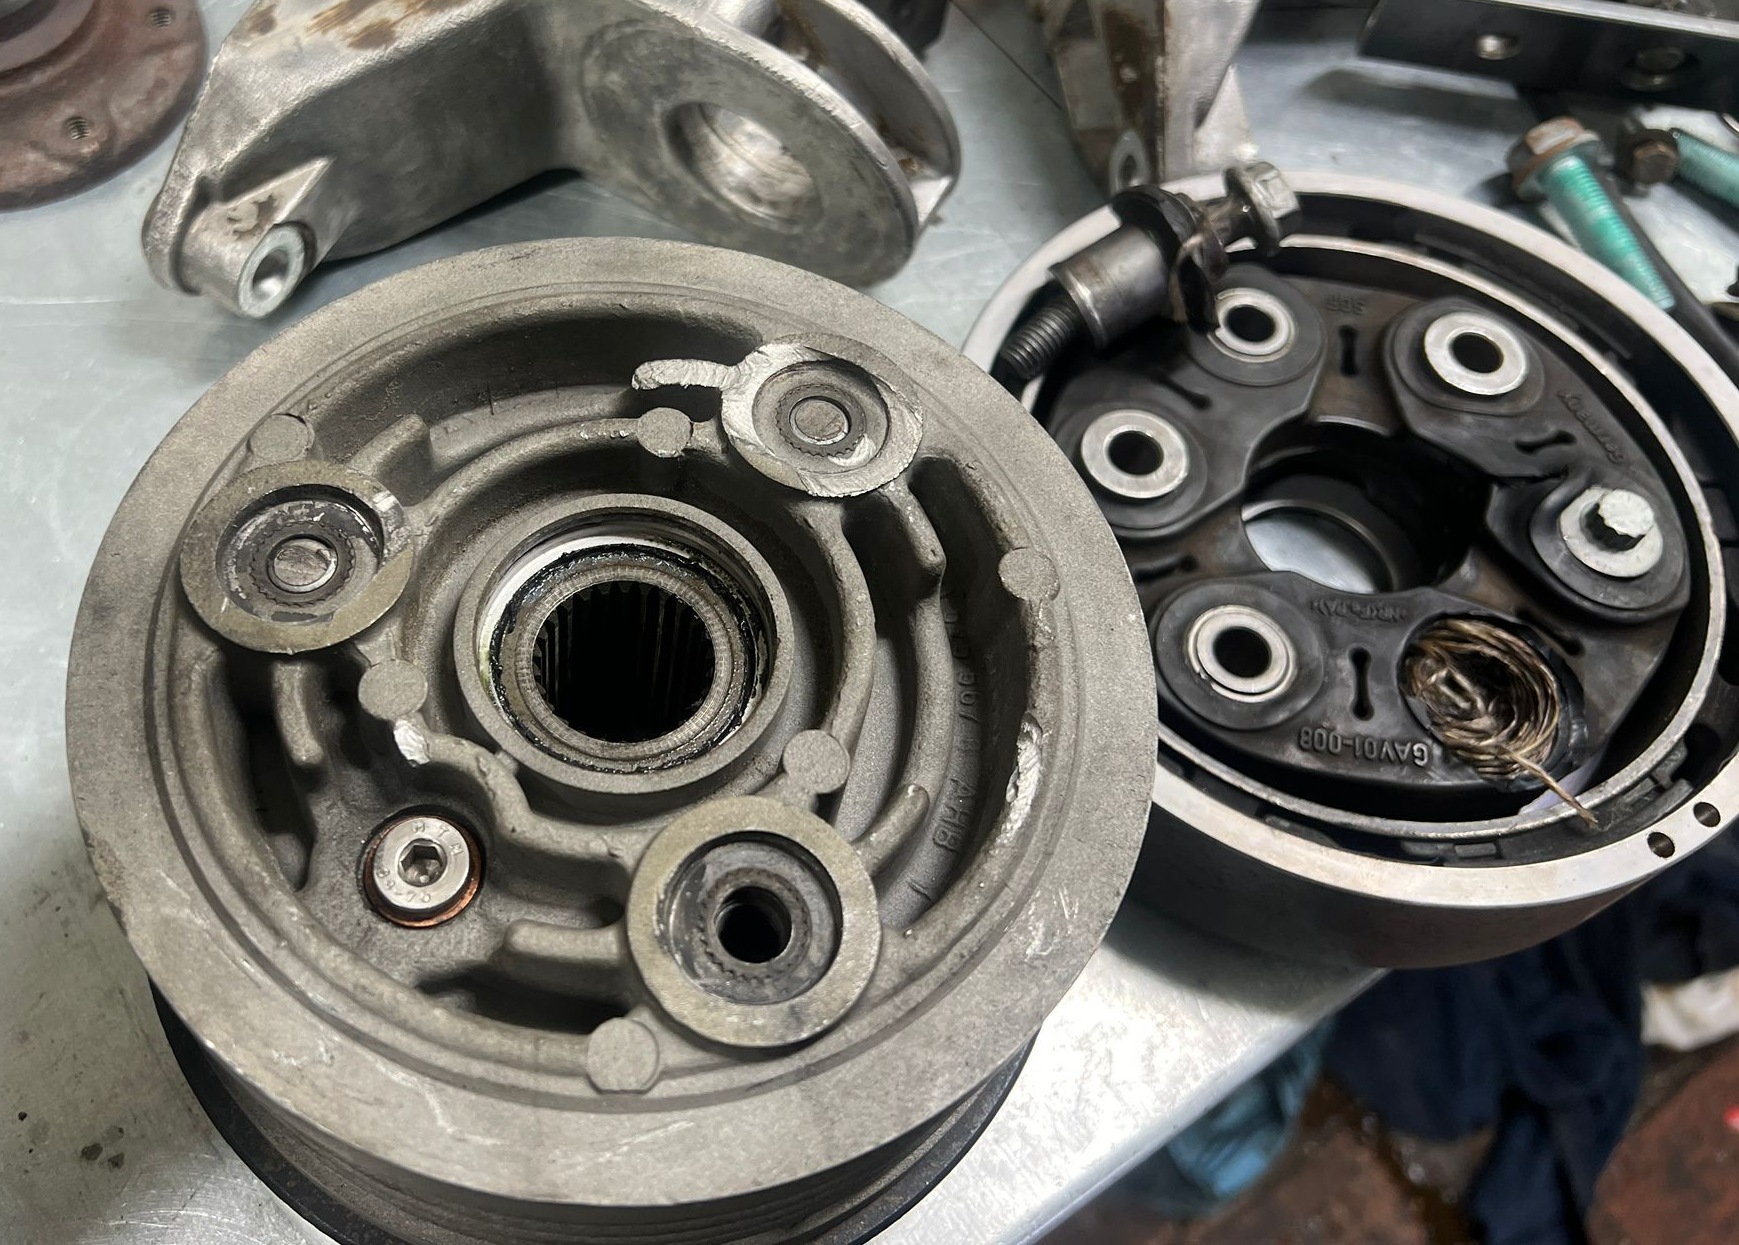
Before installing the old vibration damper (rag joint) one should check it for damage and cracks. The rubber bridge often comes loose from the outer vibration damper to the inner metal basket. This usually manifests itself in vibrations in the drive train.
 |
 |
Unfortunately, the original vibration damper is not available at VW as a separate spare part. However, the mechanical dimensions of the rear joint of the later 4-Motion models fit:
-
Golf 4 4-Motion part no: 1J0 521 307 CGolf 5 4-Motion part no: 1K0 521 307 A
The 4-motion vibration damper has different bushings on one side (21 instead of 22), which can cause the 3x M10 screws to shear. As a result, the damper and the VC gets destroyed. Important: Since the 4-Motion joint disc is 4.5 mm thicker, original T4 bolts cannot be reused; use M10x45 for the Visco coupling, as using M10x60 bolts there will destroy the threaded bushes and cause total unit failure.
We strongly warn against using the 4-Motions damper!
A suitable vibration damper for the T4 Syncro with 2 x 22mm is available at Allradbus.
.
| |
 |
 |
 |
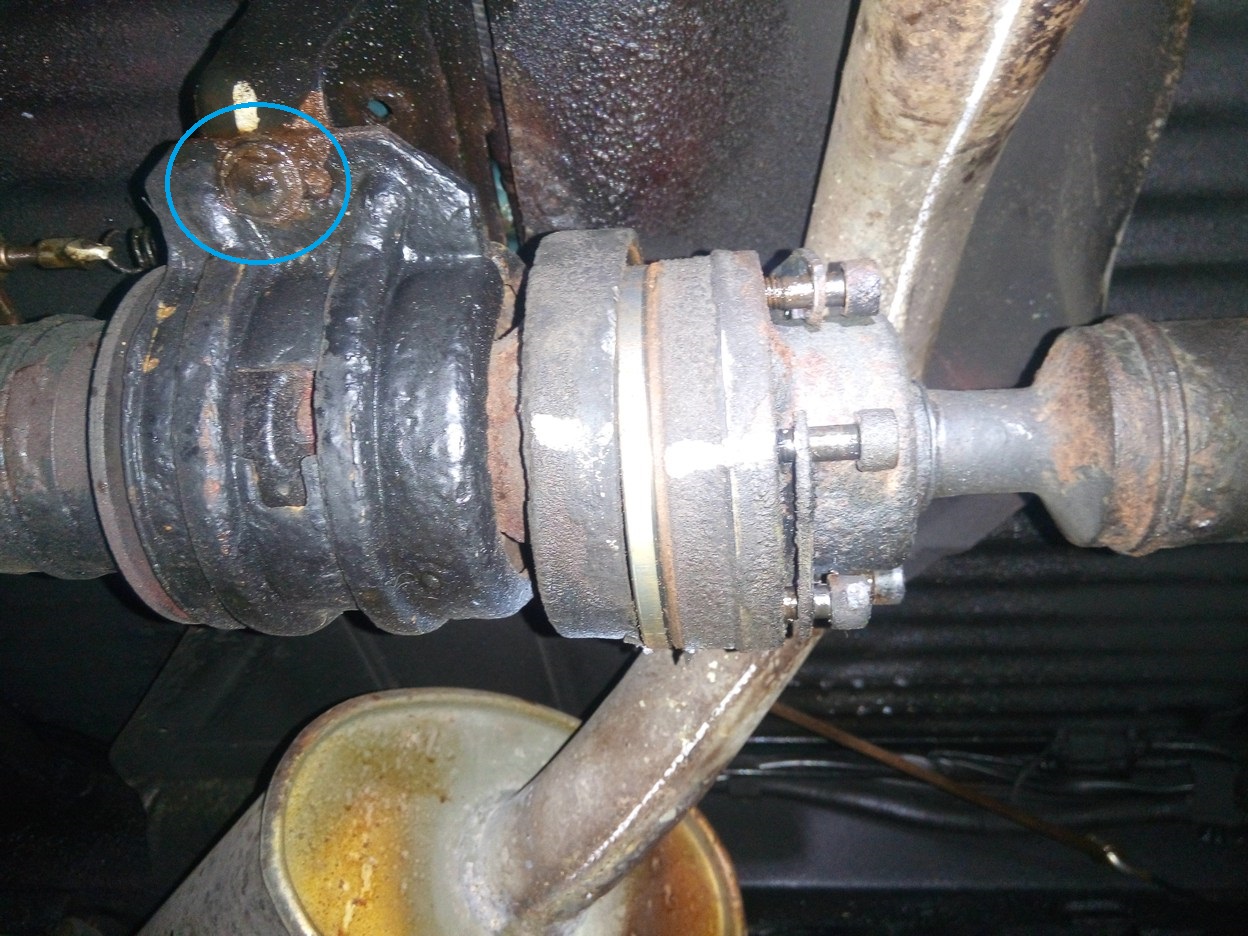
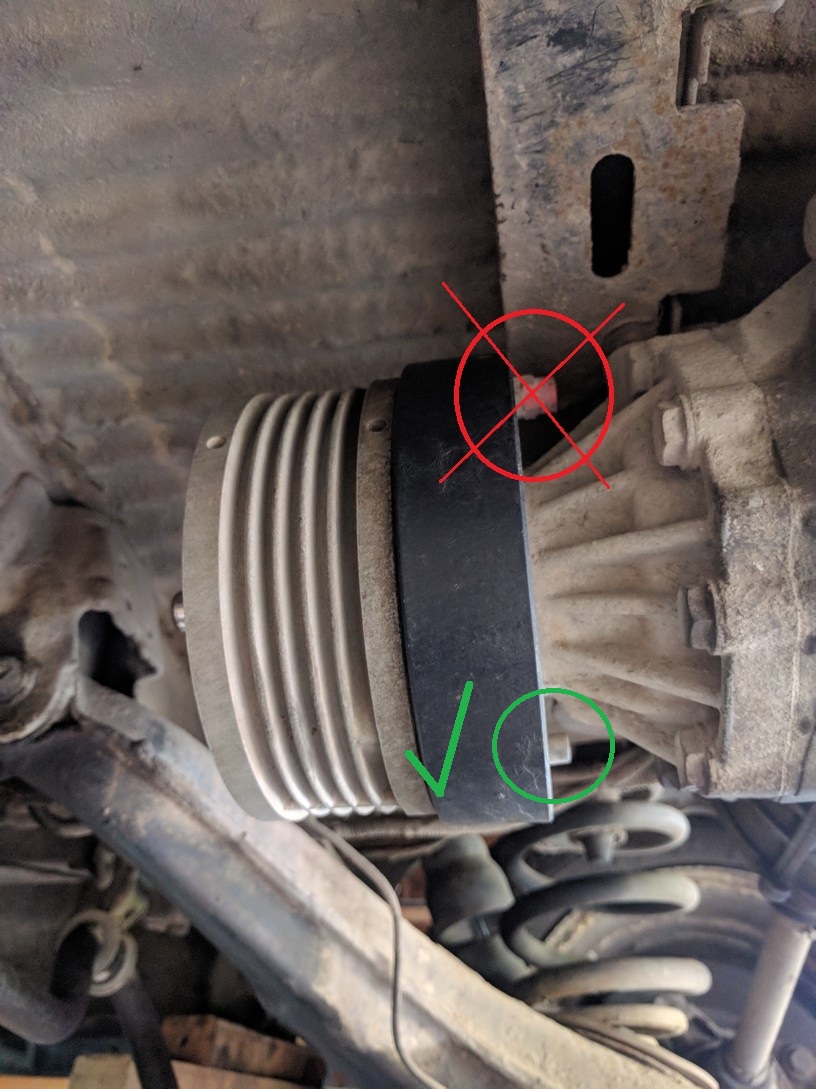
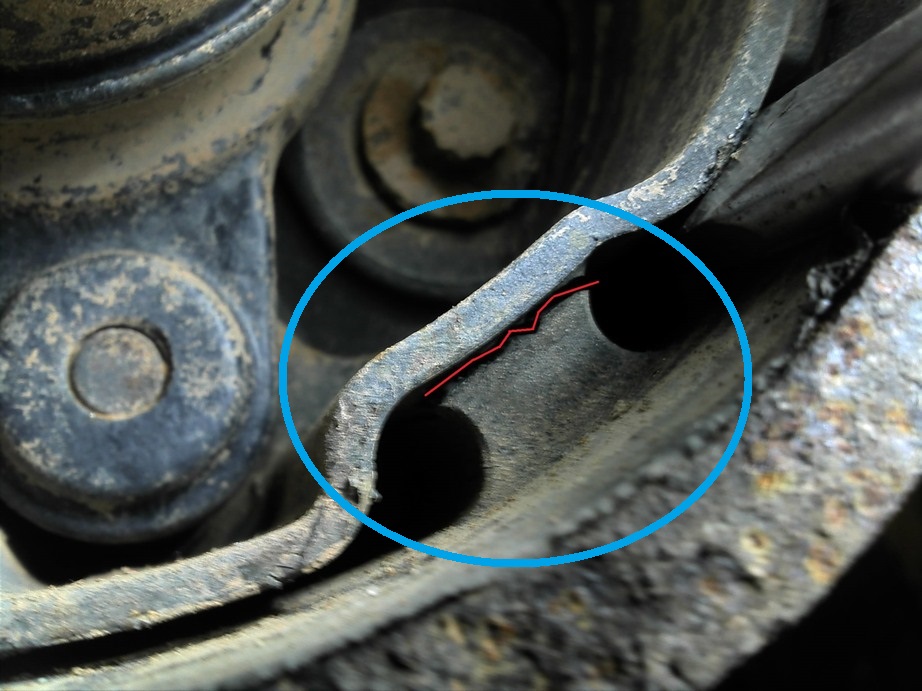
- Grease the sealing ring in front of the center sleeve of the prop-shaft tube (see circle) with VW sealing grease G 052 128 A1
- Push the prop-shaft tube as horizontally as possible (do not tilt) onto the centering pin
- Thread the prop-shaft tube into the constant velocity joint and loosely screw the intermediate bearing to the body
- Tighten 3 x M10 multi-toothed screws of the joint on the VC with 55Nm
.
 |
 |
- Tighten 6x M8 Allen screws of the prop-shaft on the constant velocity joint to 30Nm
- Tighten 2x M8 hexagon screws of the intermediate bearing to the body with 30Nm
- Carefully push the rubber protective ring back into the vibration damper (joint)
Finally, refill the differential with gear oil. The oil level is correct when the differential is filled up to the lower edge of the filler hole. Up to this level you need about 1L of gear oil. Then tighten the filler plug to 25Nm.
Our installation guide – now available as a video!
In collaboration with T3 Offroad, we’ve created a detailed installation video (available in German only). Watch the complete step-by-step assembly in practice: