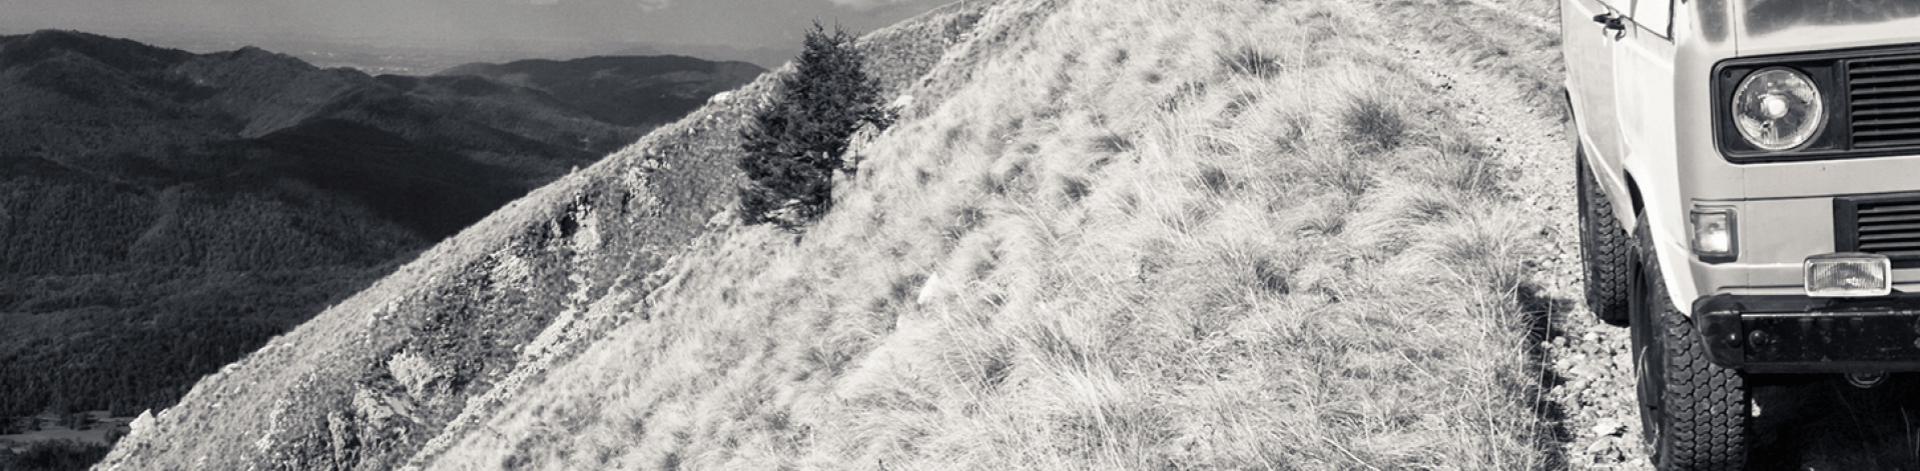
These illustrated instructions for changing the viscous coupling show the installation situation on the VW Golf Country. The procedure is based on the VW repair manual “02C all-wheel drive” from 1997 and applies universally to:
- Golf 2 Syncro (Country / Rallye) 1986 – 1991
- Jetta 2 Syncro 1986 – 1991
- Golf 3 Syncro (VR6) 1993 – 1998
- Passat 35i Syncro (VR6) 1990 – 1997
Note: This guidance is not an official repair manual – it is just our recommended way how to do it. And we assume that every bolt can get opened easily – just one rusted screw can change the situation drastically.
Procedure: First the rear segment of the propshaft is removed. Then you can remove the viscous coupling from the input shaft of the differential. The old gear oil should be drained beforehand. A lifting platform makes work considerably easier, but the change is also possible with simple ramps.
Tools:
- 17 mm Allen-head spanner or socket (male-type)
- 20,8 mm spark plug socket (13/16 inch)
- Torque wrench (60 Nm)
- 10 XZN Socket (female-type)
Spare parts / consumables:
| Spare part nr. | Description | Option |
| 020 301 189 T | Shaft seal (differential) 65,2x50x10 [included] | Corteco – 12016928B |
| N 902 995 001 | O – Ring 28 x 2 [included] | Any |
| AMV 200 000 | VW Threadlocker | Loctite 270 |
| G 055 128 A1 | VW Grease (replaces G 052 128 A1) [included] | – |
| G 060 726 A2 | VW Gear oil G50 – 1 liter | Gear oil 75W90 – GL5 |
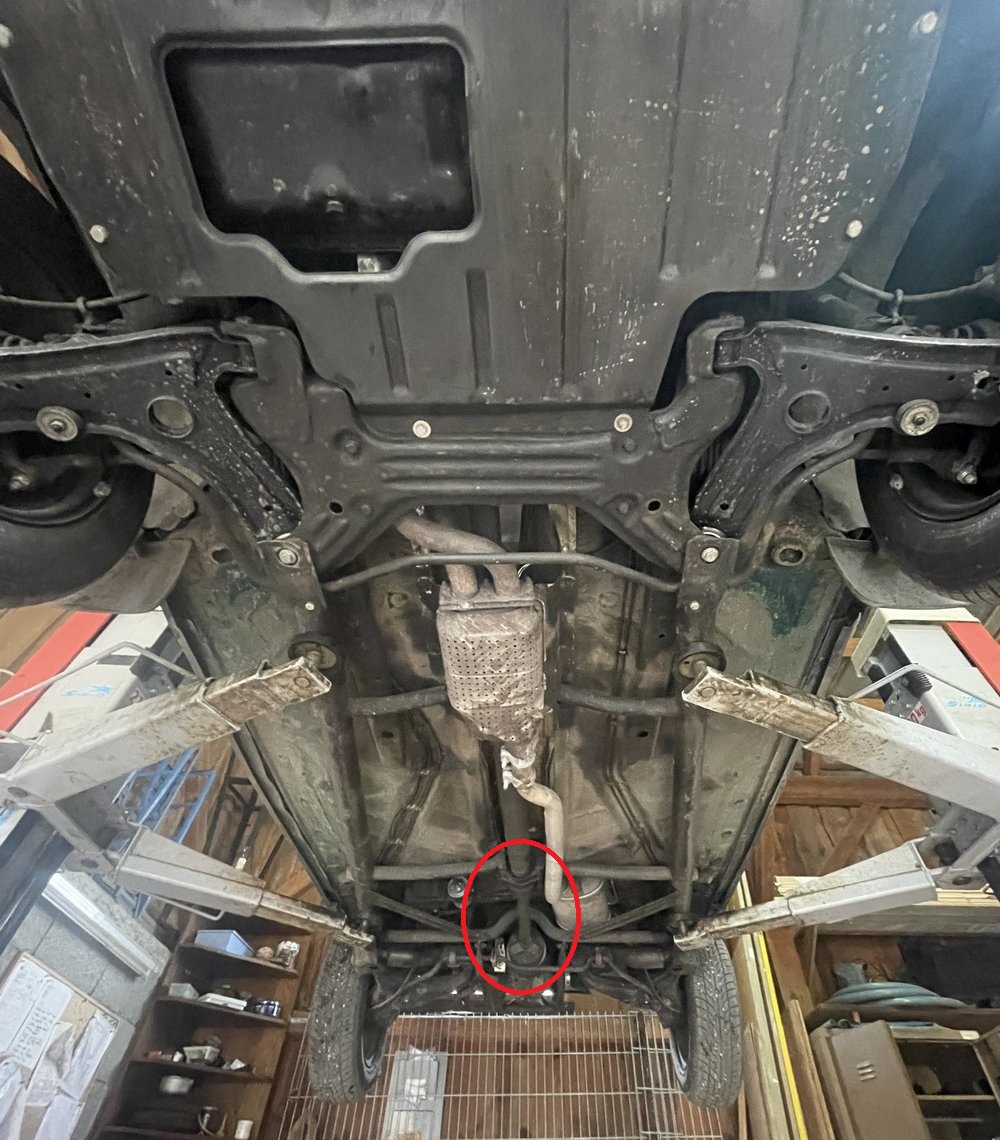
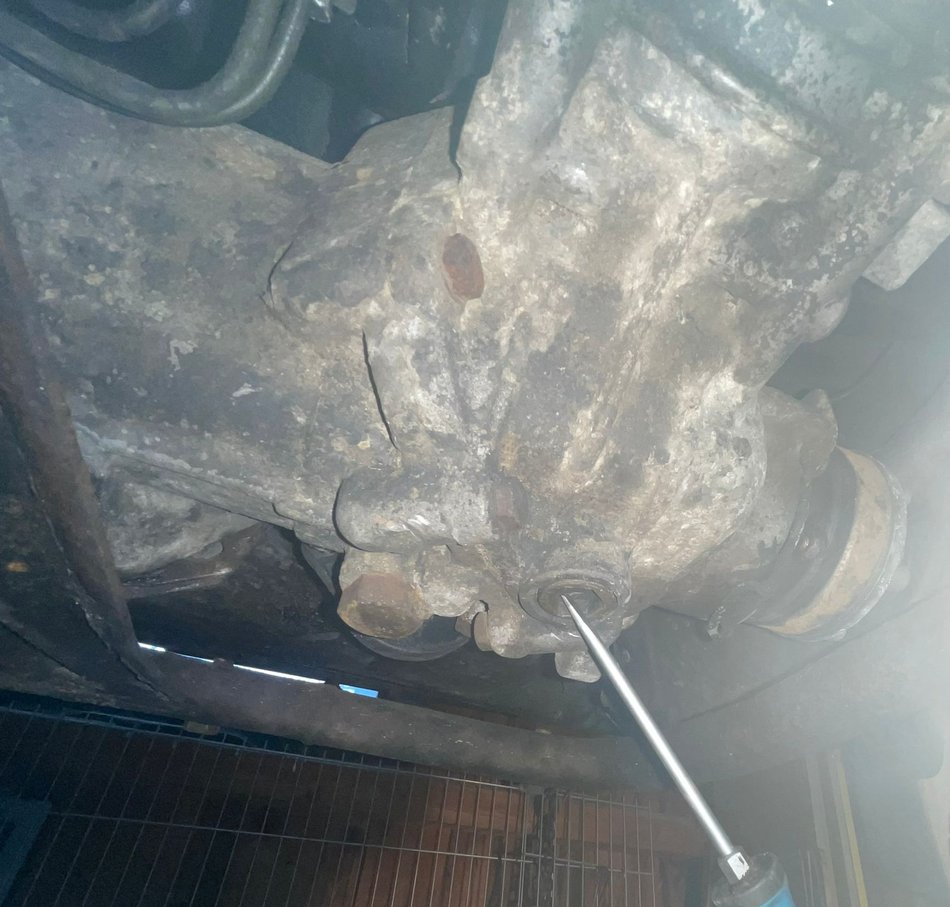
1) Drain the gear oil (differential)
First you should check whether the two screw plugs can be opened with the 17 mm Allen key. You start with the filler plug. The screws do not have a sealing ring, but seal via a conical pipe thread (taper thread) directly in the aluminum thread.
 |
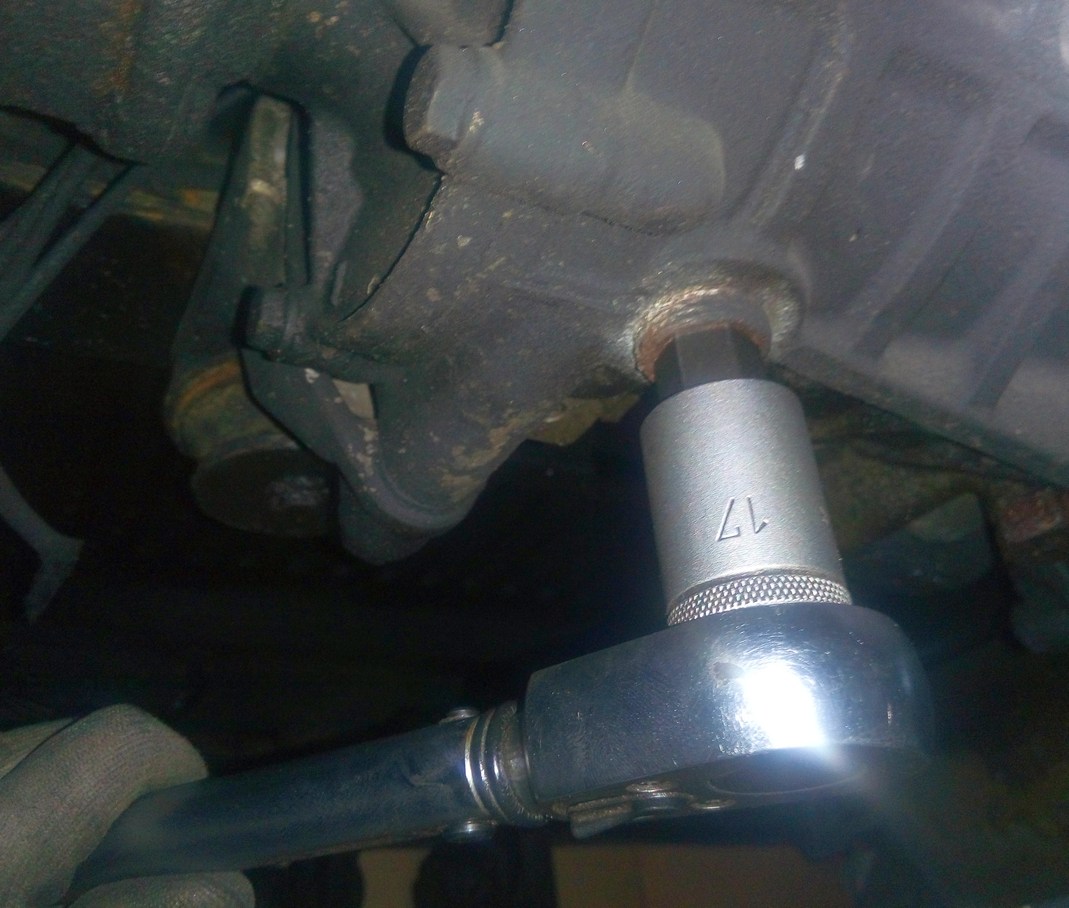 |
The screws are often rusted or tightened too much due to ignorance of the sealing function (25 Nm tightening torque). In any case, you should first pretreat the screws with some rust remover.
After the drain plug has also been unscrewed, check the abrasion on the magnet. Fine metal powder is ok, but coarser metal fragments do not bode well. At best, the drained gear oil should make up 0.7 liter. If there is a large shortage (> 0.3 l), one must assume that the pinion bearing has not been properly lubricated.
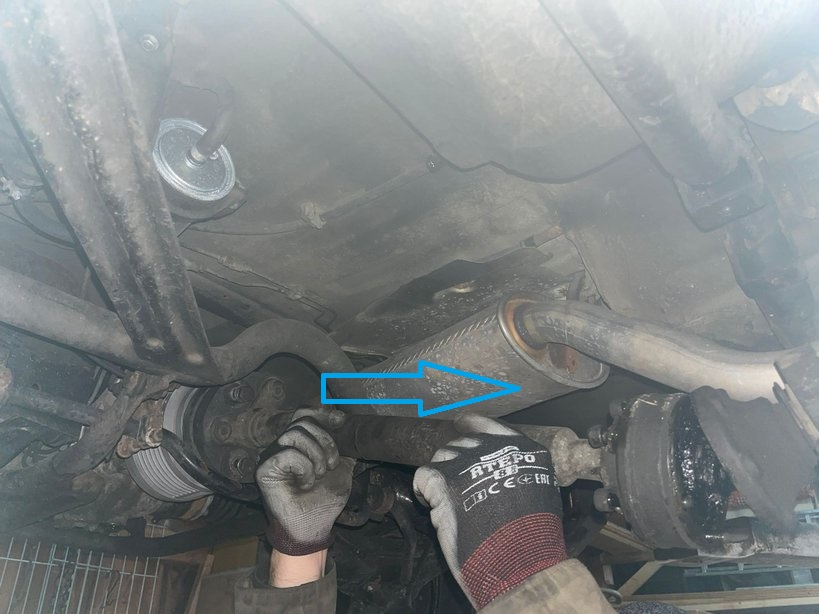
2) Demount rear prop-shaft segment
First, the position of all parts of the rear propshaft to each other is marked with a touch-up pen. The reassembly takes place in the same position, otherwise hum and unbalance may occur.
 |
 |
- Unscrew the 6x M8 connecting screws on the constant velocity joint of the prop-shaft (scrape free beforehand)
 |
 |
- Unscrew 3x M10 screws on the hardy disc
- Tie up the prop-shaft tube at the front or catch it from below
 |
 |
 |
 |
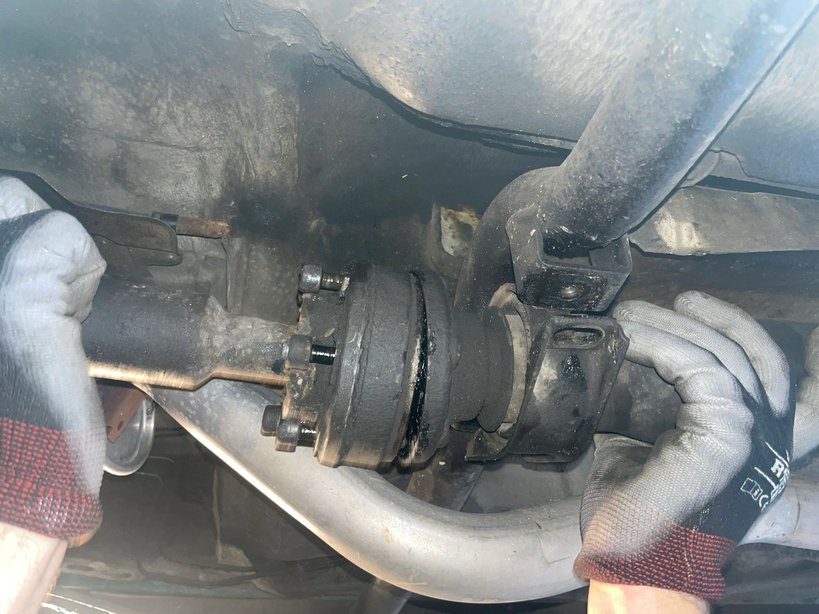
- Unscrew the 2x M8 fastening screws on the intermediate bearing, supporting / supporting the rear prop-shaft tube
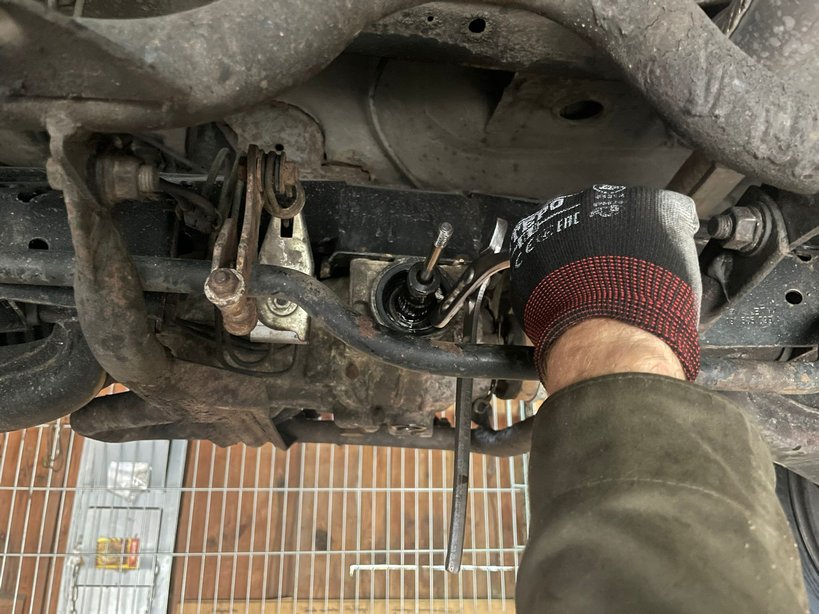
- Pull the rear prop-shaft tube as horizontally as possible from the centering pin of the viscous coupling. Proceed with care, otherwise the sensitive plastic centering sleeve in the vibration damper can be damaged!
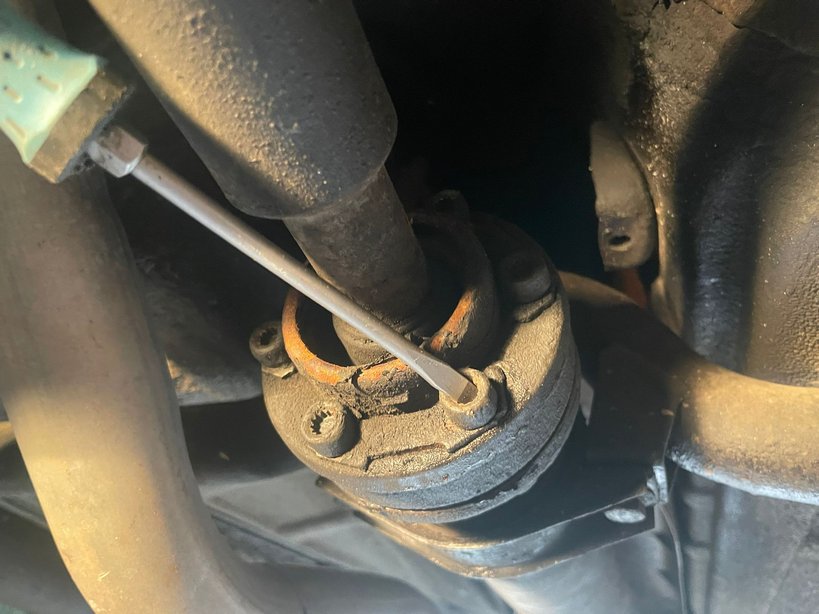
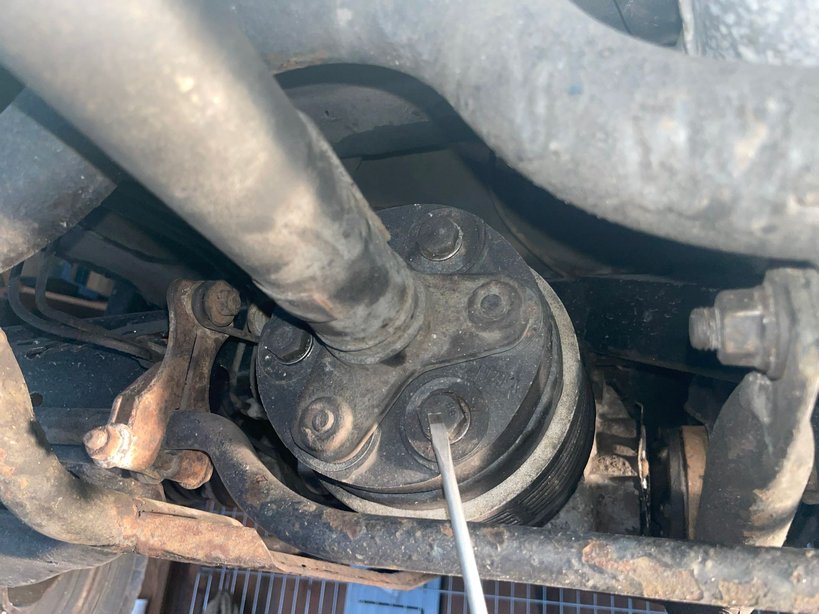
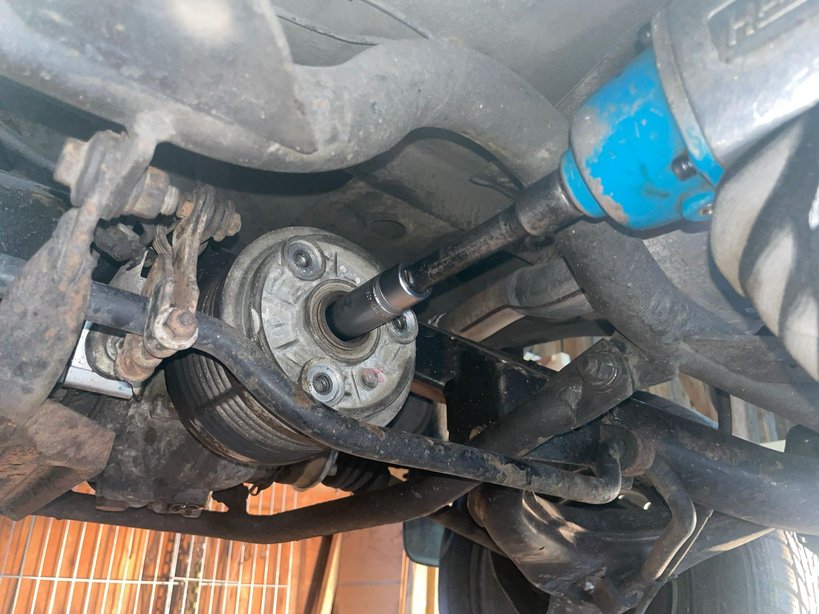
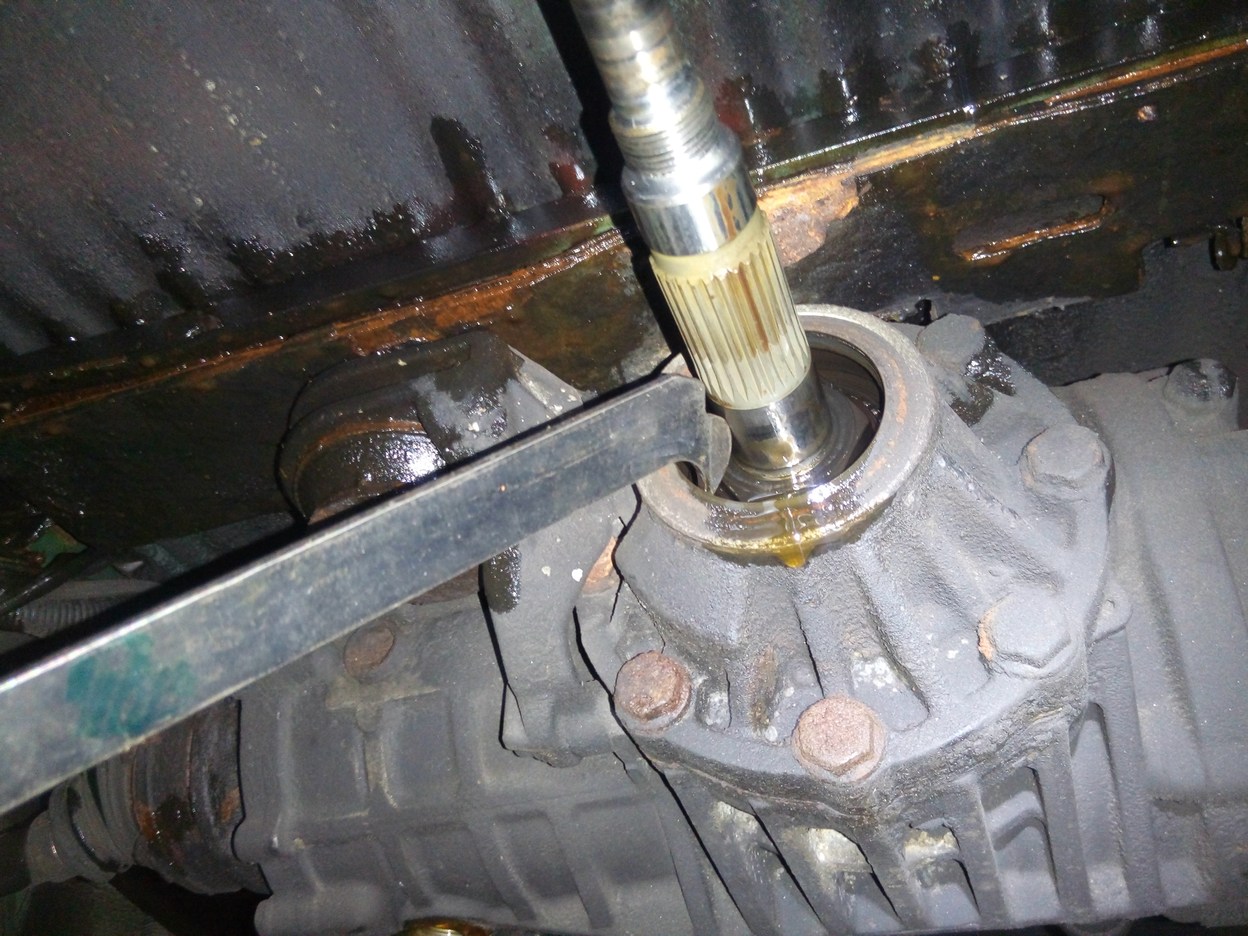
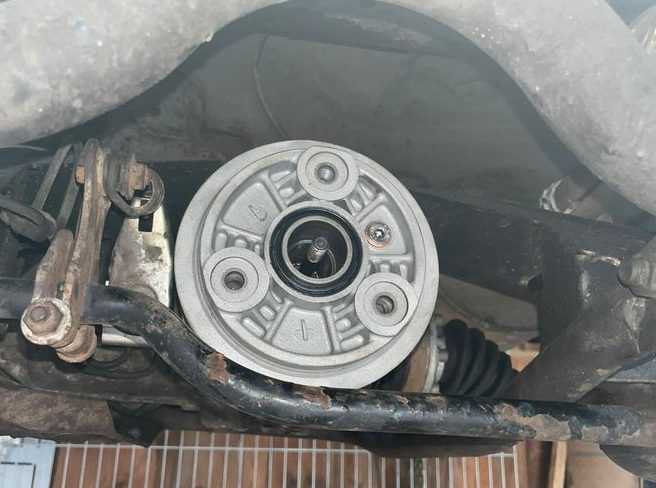
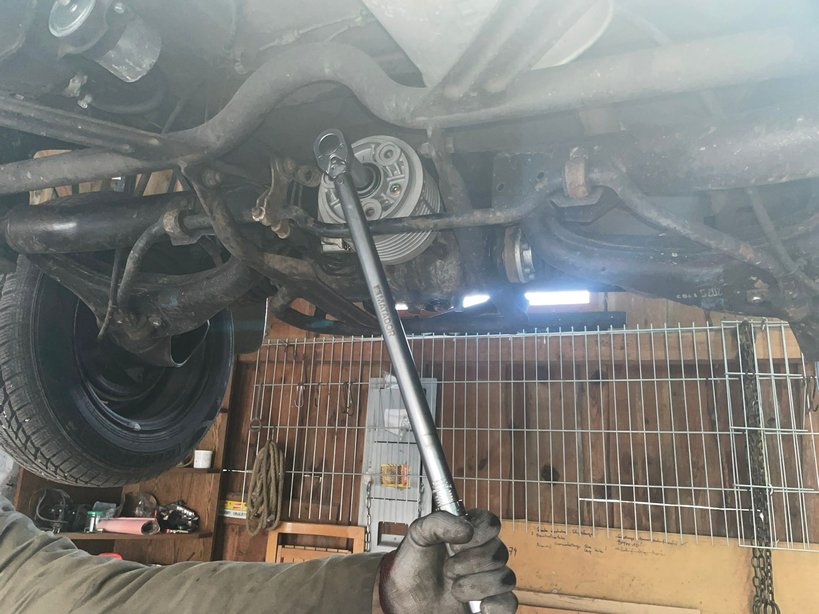
3) Remove the Viscous Coupling
Loosen the centering nut (SW 20.8) with a spark plug socket and an impact wrench and remove the centering nut. If an impact wrench is not available, then insert 2x M10 screws and counterhold with a mounting lever.
 |
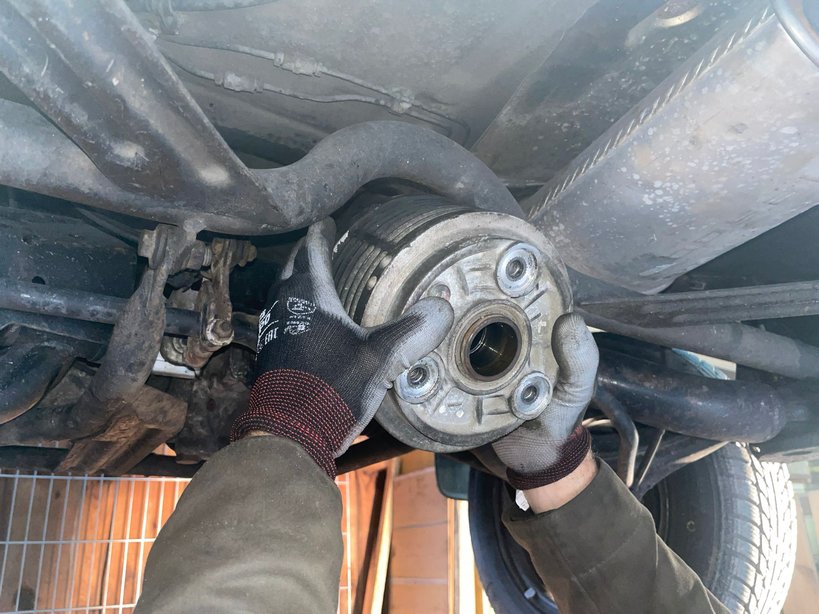 |
Then you can simply pull off the viscous coupling to the front.
4) Replace the shaft seal in the differential
If the shaft seal (020 301 189 T / 65,2x50x10) has not yet been replaced in the differential, then you should take the opportunity straight away. In the VW repair guide, the VW 681 special tool is used to pull out the shaft seal. But it also works with a stable screwdriver. Make sure not to damage the aluminum seat in the edge area. Therefore, you should place a small piece of wood in the edge area.
 |
 |
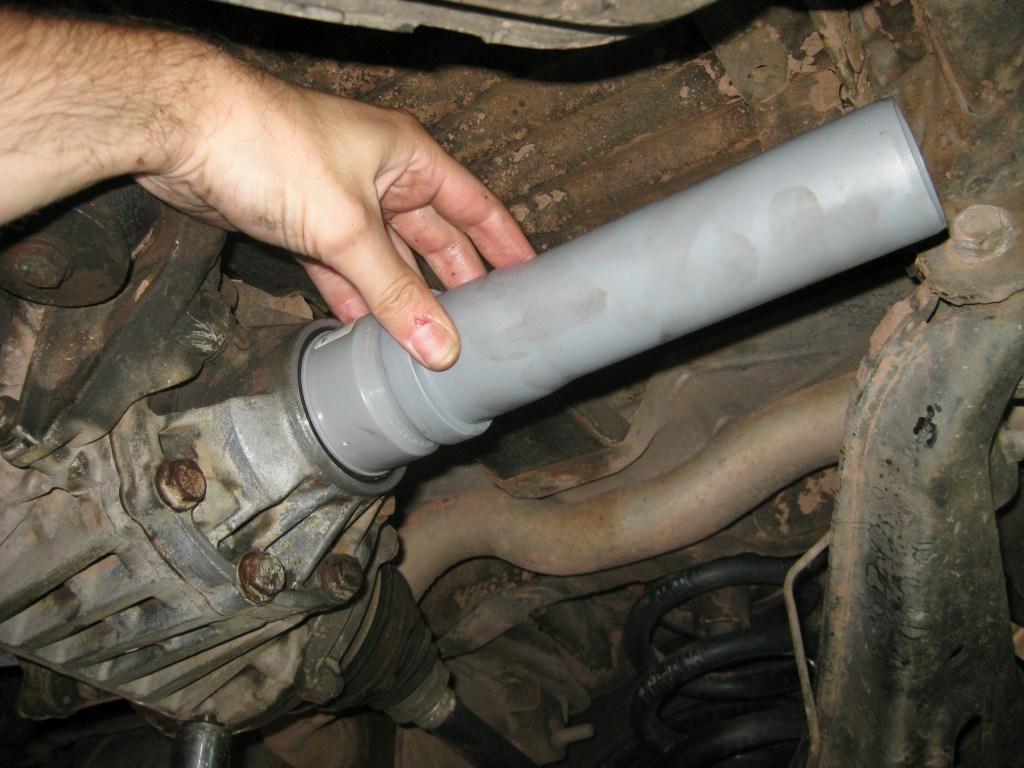
Lightly oil the new shaft seal on the outside diameter with some gear oil. It is best to drive in with a suitable plastic pipe. If you proceed carefully, you can also work directly with the hammer if necessary. Then fill the space between sealing- and dust-lip with the VW sealing grease G055 128 A1.
 |
 |
.
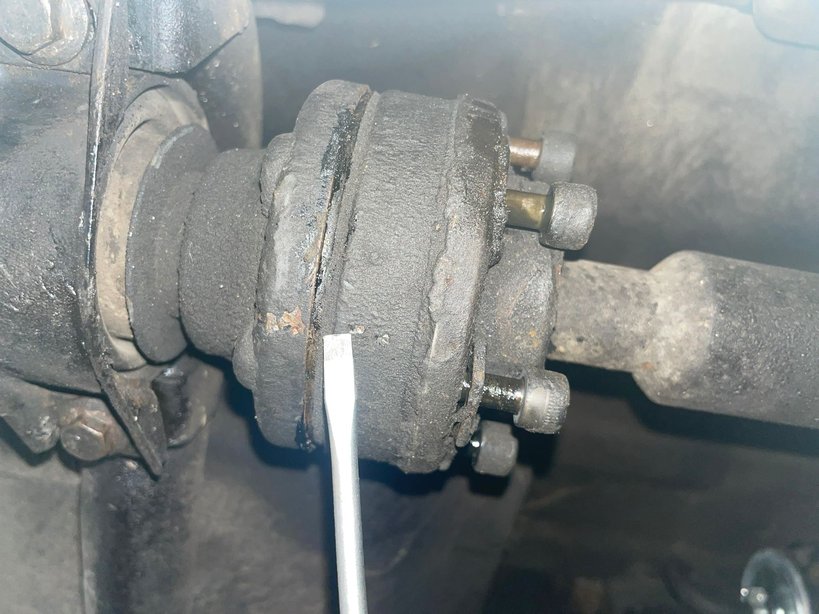
5) Install the new VC
After the shaft seal in the differential has been successfully replaced, the new VC is installed in reverse order.
 |
 |
 |
 |
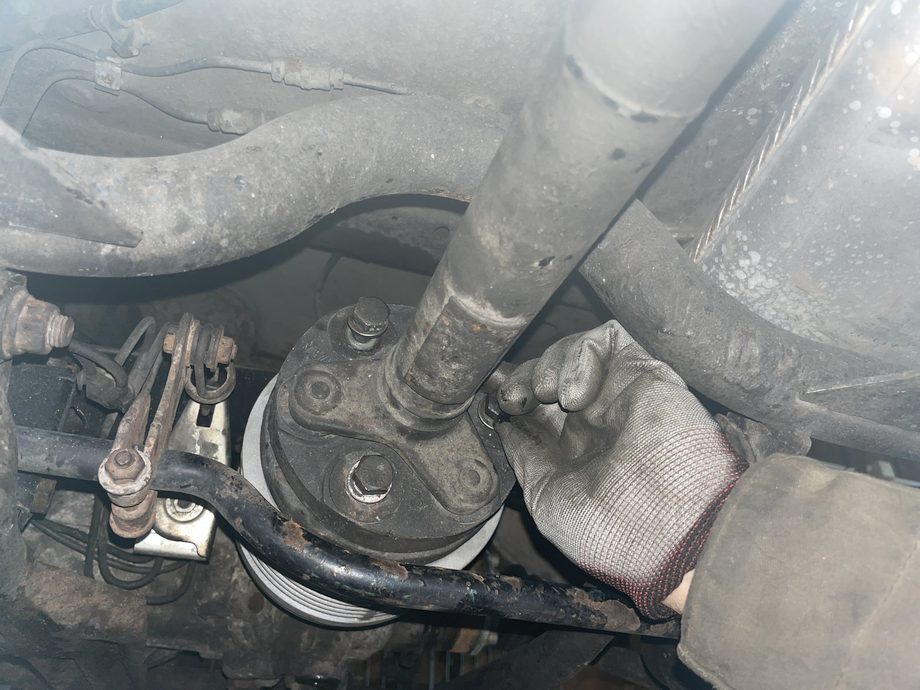
- Slide on the VC by turning it slightly
- Exchange the O-Ring (28 x 2) of the centering nut and grease it u
- Screw on the centering nut (20,8mm) with 45 Nm and use VW thread lock or Loctite 270
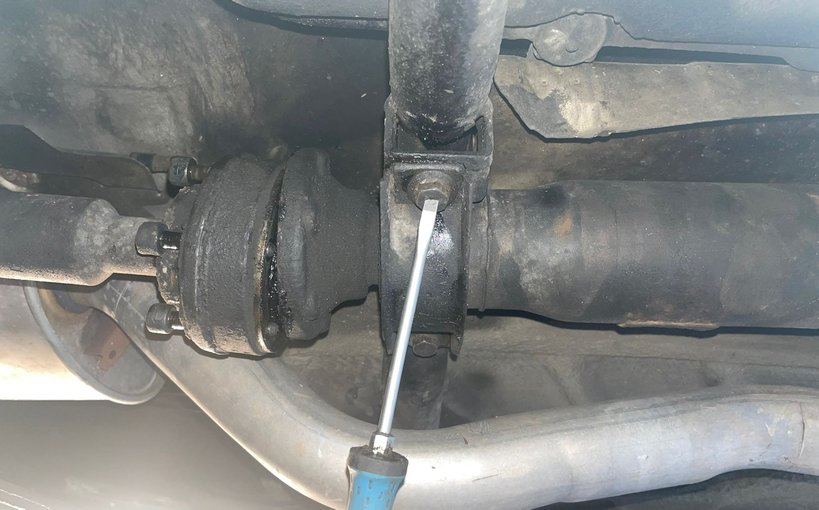
6) Reassembly
Before installing the old hardy-disc one should check it for damage and cracks.
| |
 |
 |
 |
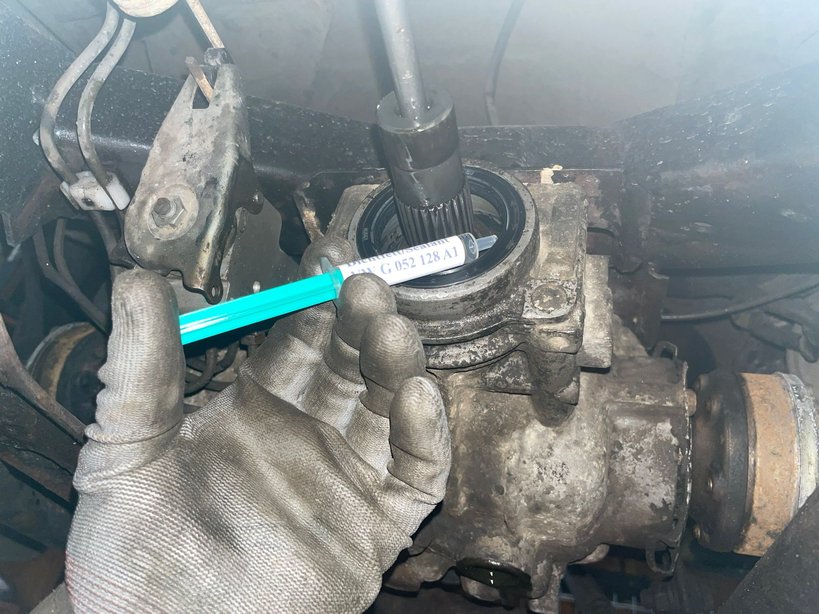
- Grease the sealing ring in front of the center sleeve of the prop-shaft tube (see circle) with VW sealing grease G 055 128 A1
- Push the prop-shaft tube as horizontally as possible (do not tilt) onto the centering pin
- Thread the prop-shaft tube into the constant velocity joint and loosely screw the intermediate bearing to the body
.
 |
 |
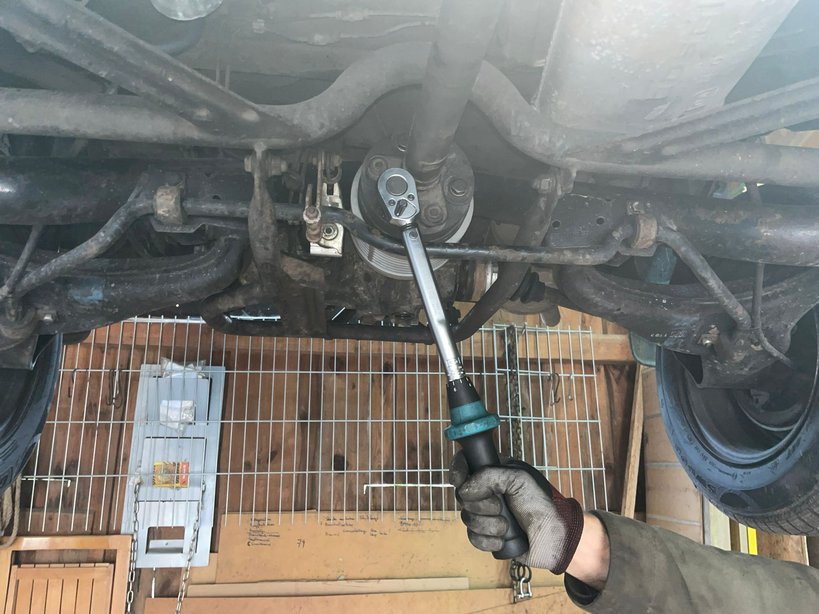
- Tighten 3x M10 screws of the hardy-disc on the VC with 55 Nm
- Tighten 6x M8 screws of the prop-shaft on the constant velocity joint to 35 Nm
- Tighten 2x M8 hexagon screws of the intermediate bearing to the body with 25 Nm
Finally, refill the differential with gear oil. The oil level is correct when the differential is filled up to the lower edge of the filler hole. Up to this level you need about 0,7 l of gear oil. Then tighten the filler plug to 25Nm.